Lesson 3
In this lesson, we explore how perspective, light, and composition work together to create depth and harmony in drawing.
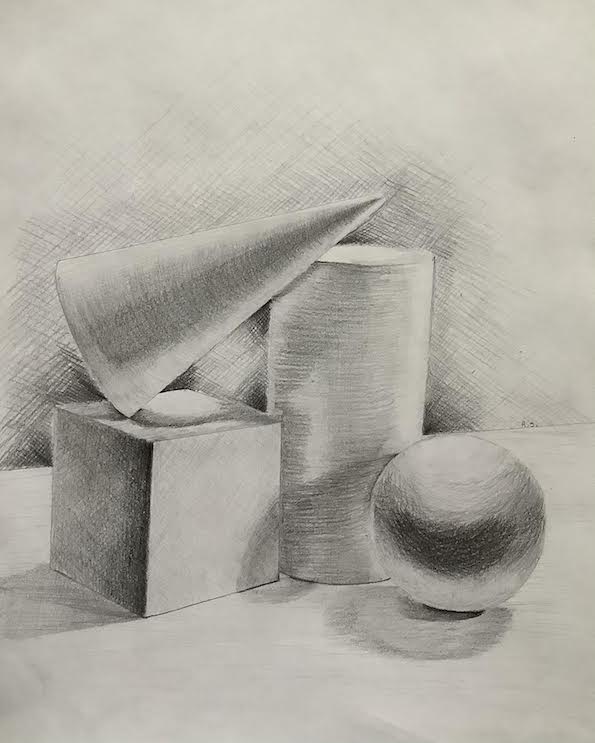
You’ll begin by studying frontal (one-point) and linear (two-point) perspectives to understand how to build solid, spatial forms. Through tonal studies of cubes, you’ll learn how light defines structure and how subtle gradations of value create the illusion of volume.
We’ll also cover essential rules of composition – eye flow, variety and unity, and the rule of thirds – to help you arrange your elements with balance and purpose.
On the practical side, you’ll practice proportional and intuitive drawing methods, develop tonal shading skills, and create a ribbon study using the cylinder tonal scale.
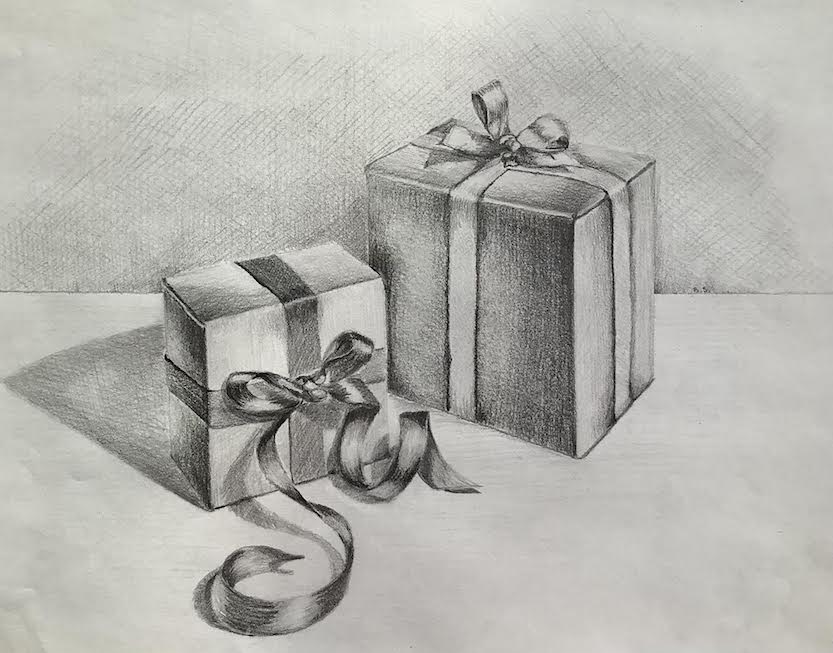
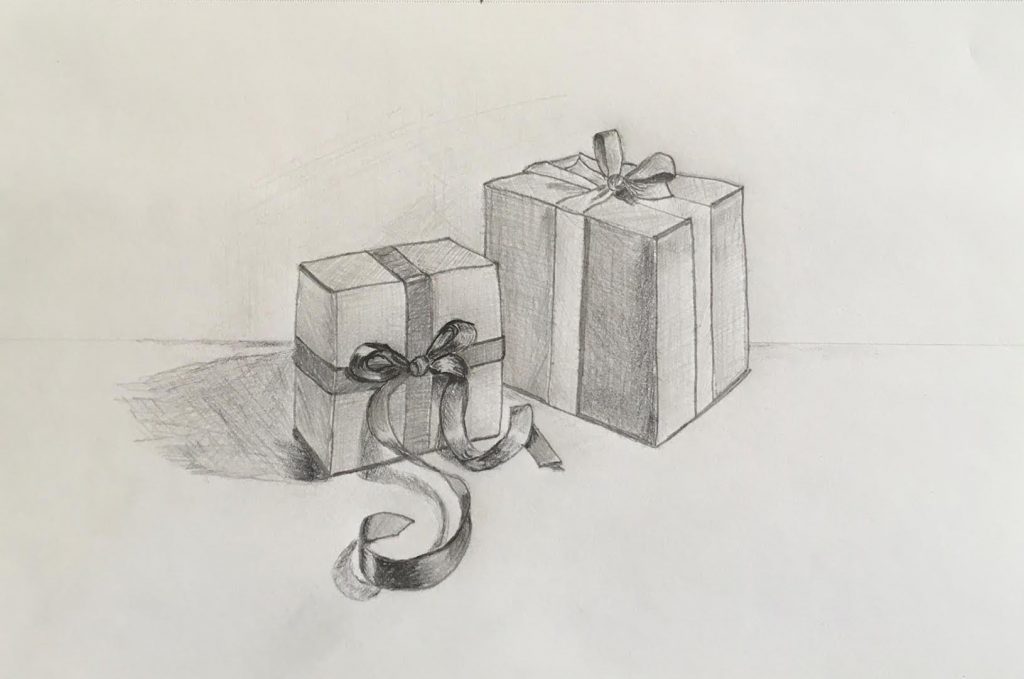
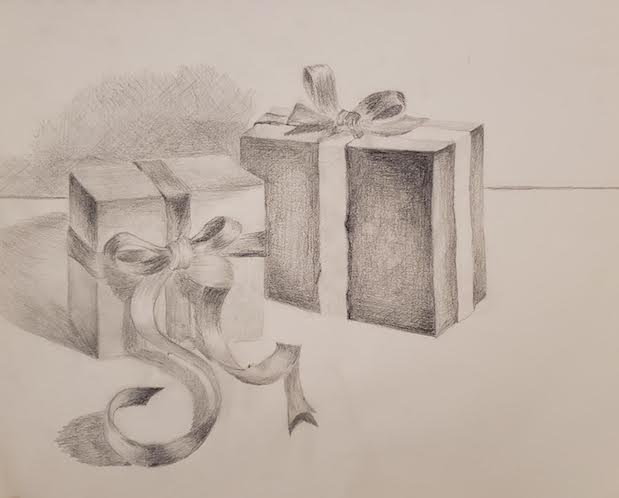
The lesson concludes with a still life of two gift boxes with ribbons, where you’ll combine all techniques — perspective, tone, and composition — into a cohesive and expressive drawing.
Use these buttons to navigate the lesson content
Please use this navigation button to jump directly to the homework upload section at the bottom of the lesson page
THEORY AND VISUAL EXERCISES

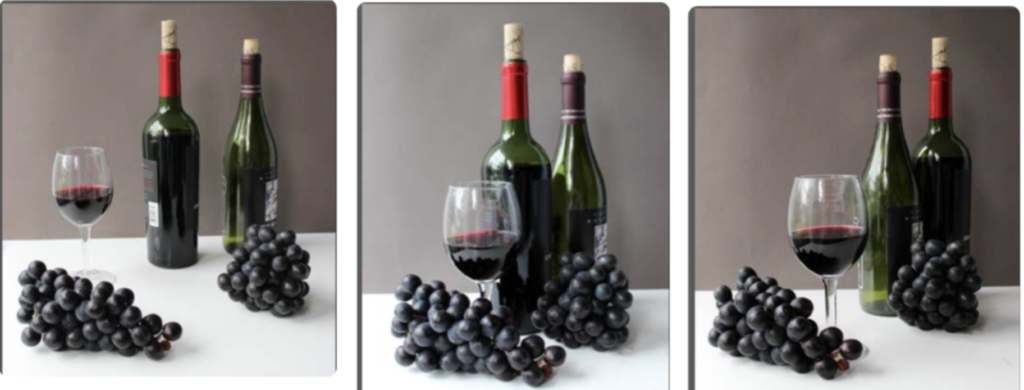
Still Life Composition 
Frontal Perspective 
Linear Perspective
Still Life Composition
We will cover the fundamentals of composition, based on three key rules:
- Eye Flow (Eye Movement): guiding the viewer’s gaze through the artwork smoothly.
- Variety and Unity: balancing differences in shape, tone, and spacing while maintaining harmony.
- Rule of Thirds: positioning major elements along division lines to create a visually balanced and engaging composition.
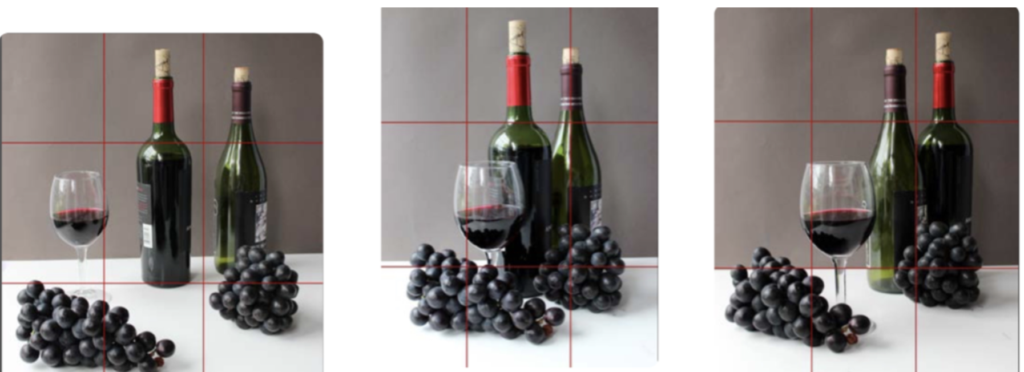
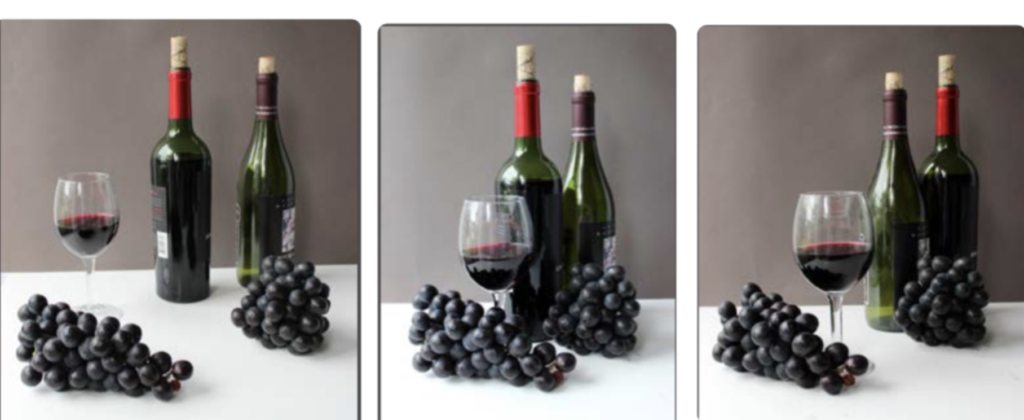
(Refer to The Basic Rules of Still Life Composition PDF for examples.)
The Basic Rules of Still Life Composition
Composition is how artists arrange objects within their artwork. The way elements are placed on the page affects how the viewer’s eye moves through the piece and how the artwork feels as a whole.
A good composition helps the viewer explore the picture naturally and enjoy the story it tells.
There are three main rules to remember:
1. Eye Flow (or Eye Movement)
This rule describes how the viewer’s eye travels across your artwork.
A successful composition gently guides the viewer’s gaze from one element to another, allowing them to see all parts of the work without confusion or distraction.
When the eye moves smoothly through the image, the composition feels complete and harmonious.
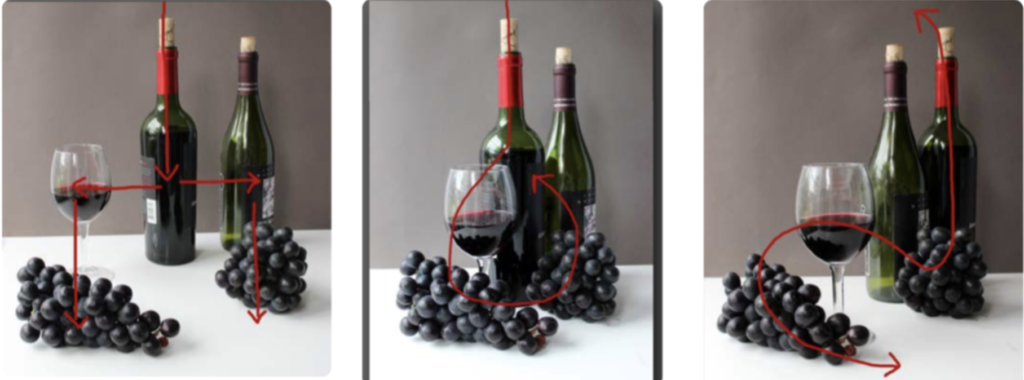
2. Variety and Unity
A strong composition balances variety and unity.
- Variety means including differences — in shapes, sizes, tones, or spacing — to keep the artwork interesting.
- Unity means making sure all elements look like they belong together.
Too much variety can make the work look chaotic, while too much unity can make it dull. The goal is to find a balance — to keep the viewer’s eye moving while still feeling harmony in the whole picture.
3. Rule of Thirds
The rule of thirds helps create balance and visual interest.
Imagine your page divided into three equal parts, both horizontally and vertically, forming a grid of nine sections.
Place the main objects or important elements along these lines or at their intersections. This simple rule helps create more dynamic and pleasing compositions than centering everything in the middle.
Putting It All Together
When these three rules work together – eye flow, variety and unity, and the rule of thirds – your composition becomes stronger.
The viewer’s eye moves easily through the artwork, the objects feel connected, and the overall image feels balanced and natural.
Remember: good composition is not about strict rules but about creating visual harmony. As you practice, you’ll start to feel what works – arranging your still life in a way that both pleases the eye and expresses your own artistic vision.
You can download this PDF file and practice the three different compositions created using the same subjects.
Understanding Perspective in Art: Creating Depth and Space
Perspective is the language of space in art – a way to transform a flat surface into a window that opens into depth, distance, and atmosphere. By mastering perspective, an artist learns to guide the viewer’s eye and create a believable sense of three-dimensionality. There are many types of perspective or “created illusion” that we will study during this course. In this lesson we will talk about Frontal and Linear Perspective.
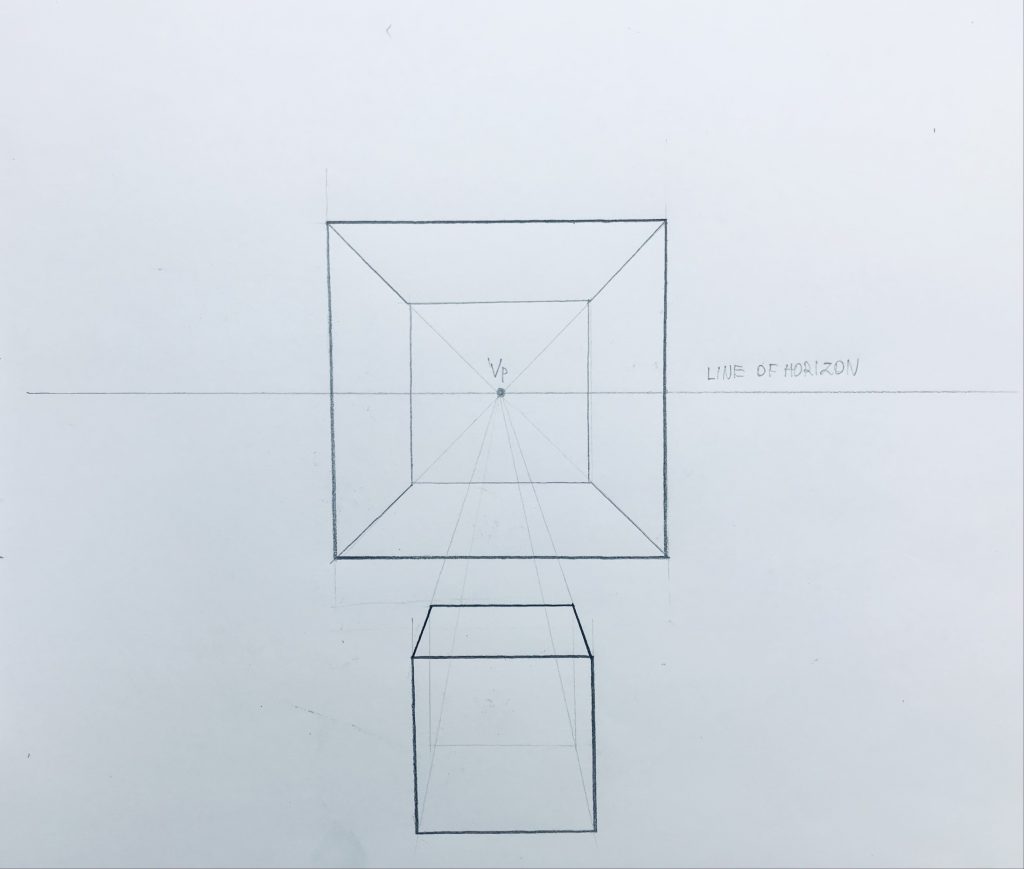
Frontal Perspective with ONE Vanishing Point
We begin by studying frontal (one-point) perspective, learning how to present cubes and boxes viewed directly from the front. This principle helps build a clear sense of spatial depth and visual organization within the picture plane.
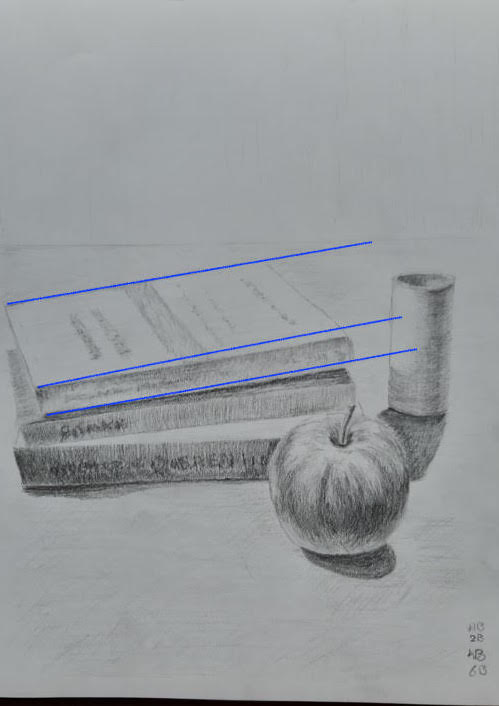
Frontal, or one-point perspective, is used when we look directly at a subject – such as the front of a building, a road, a railway, or a row of trees – where all the lines seem to recede toward a single vanishing point on the horizon.

In this type of perspective, the front plane of the object faces the viewer directly and remains parallel to the picture plane, while only the depth lines converge toward the vanishing point. This method is often seen in scenes like a straight road disappearing into the distance, a hallway, or a row of lamp posts or fences viewed head-on.
Frontal perspective creates a strong sense of depth and directs the viewer’s gaze into the center of the composition.
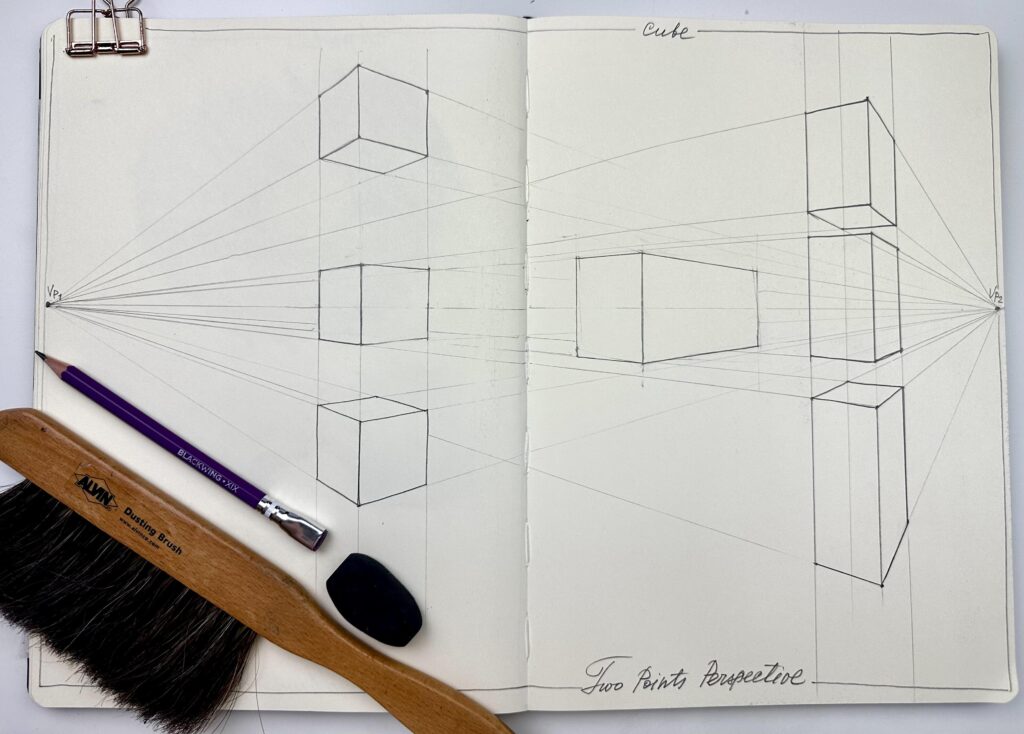
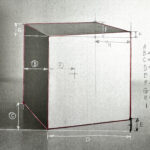
Linear Perspective with TWO Vanishing Points
Linear, or two-point perspective, is used when we view an object or a scene at an angle, so that none of its sides are parallel to the picture plane. In this case, all horizontal lines recede toward two vanishing points on the horizon – one to the left and one to the right.
This approach is common in street views, corner buildings, interior spaces viewed from an angle, or any composition where the viewer sees two sides of a form at once.
Two-point perspective adds a dynamic, natural look to the scene, giving it a sense of space and dimension that more closely resembles how we perceive the world with our eyes.
This is theoretical exercise where you can learn to establish two vanishing points and use them to maintain accuracy in drawing objects viewed from an angle. You will need a piece of paper (wide format, or tape two paper together), any pencil and long rule.
For now, let’s move forward and begin practicing how to draw a cube and create beautiful tonal values!
PRACTICAL EXERCISES
Proportional Method 
Cube Tonal 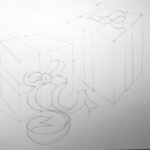
Intuitive Method 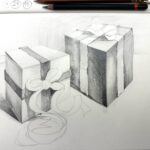
Gift Boxes Tonal 
Ribbon 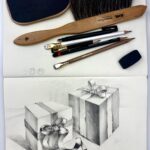
Gift Boxes Bows
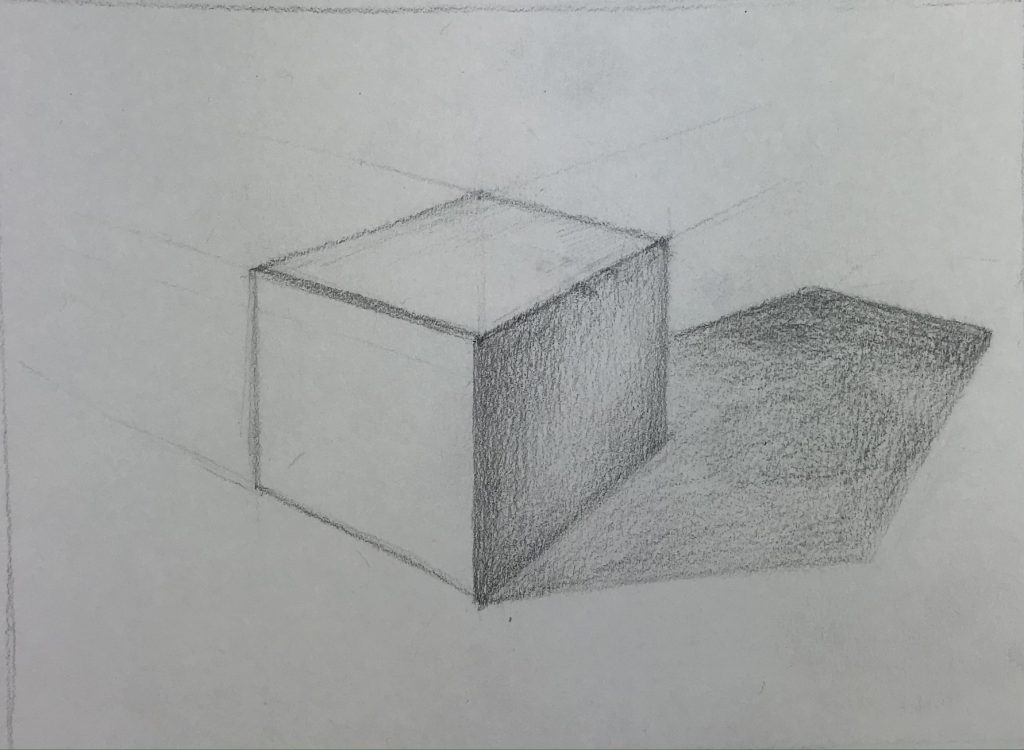
Part 1. Cube
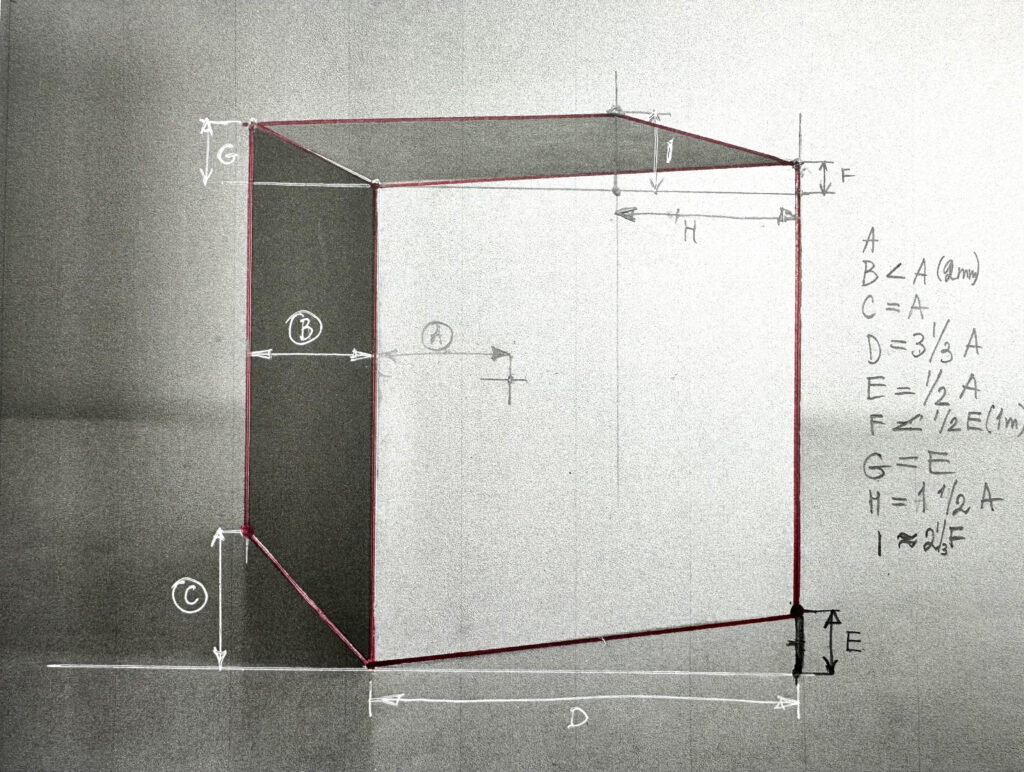
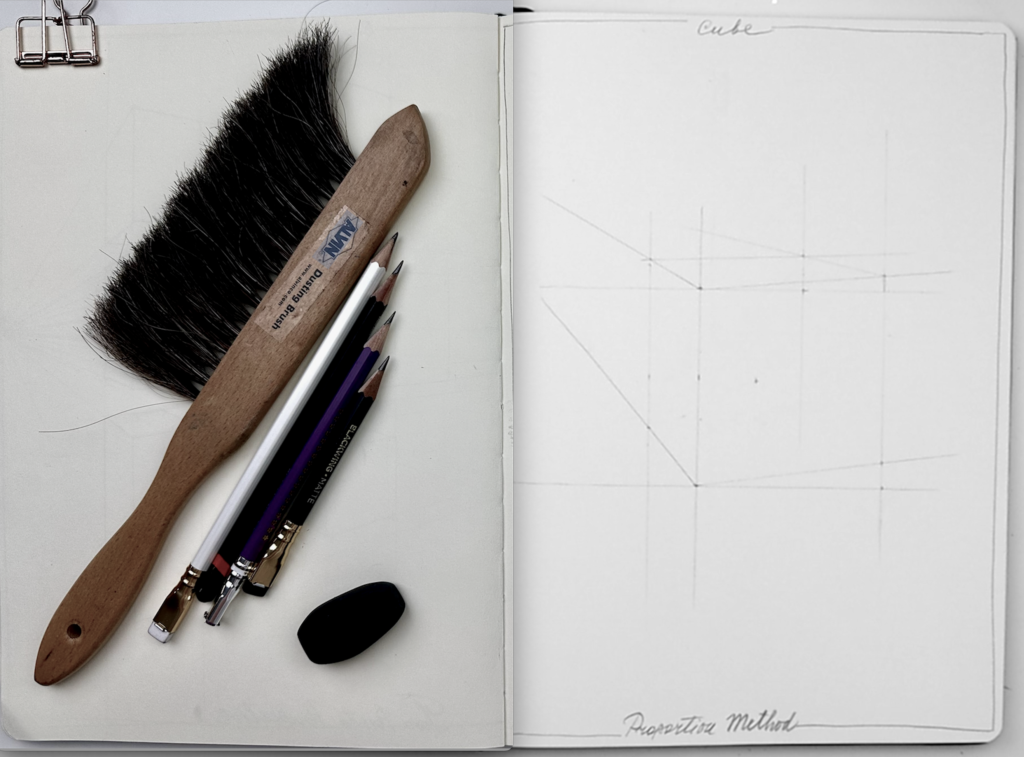
Exercise 1: Proportional Method
Learn how to accurately position and construct subjects on your paper when vanishing points are not clearly defined. This method teaches you to observe and measure proportions, helping you maintain correct relationships between shapes and angles.
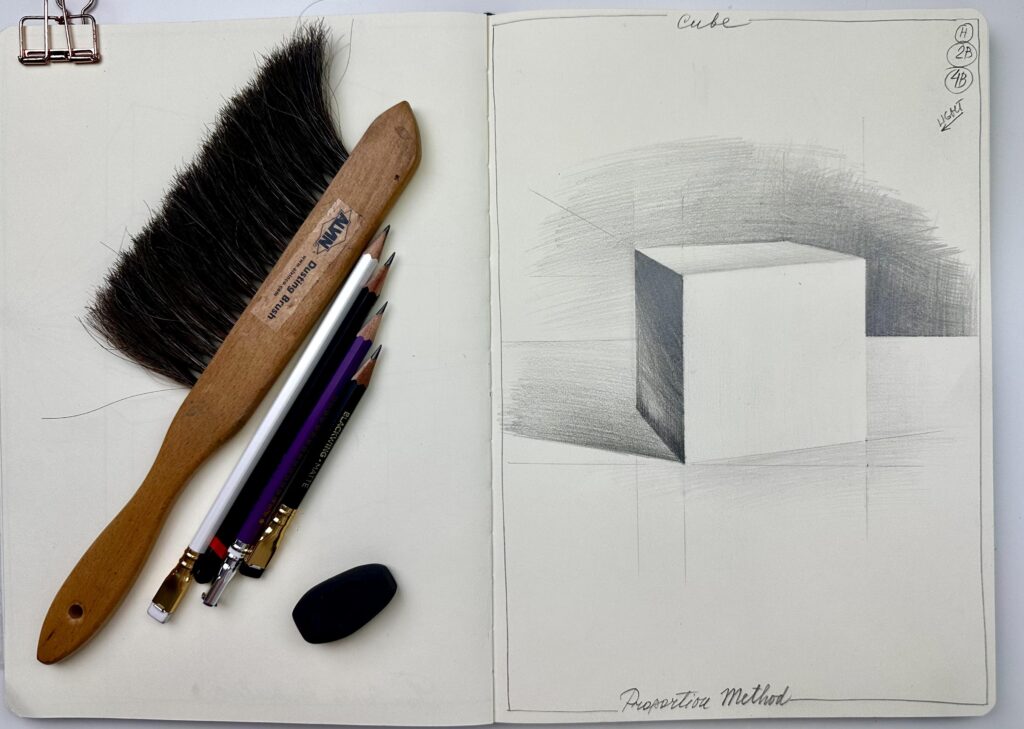
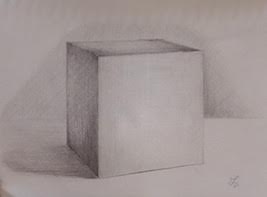
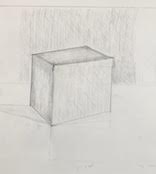
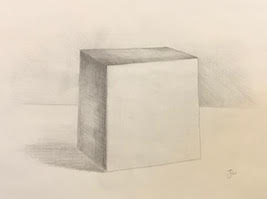
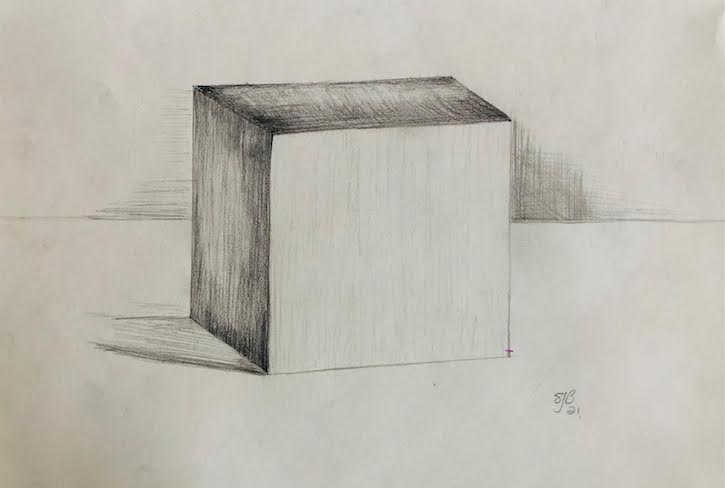
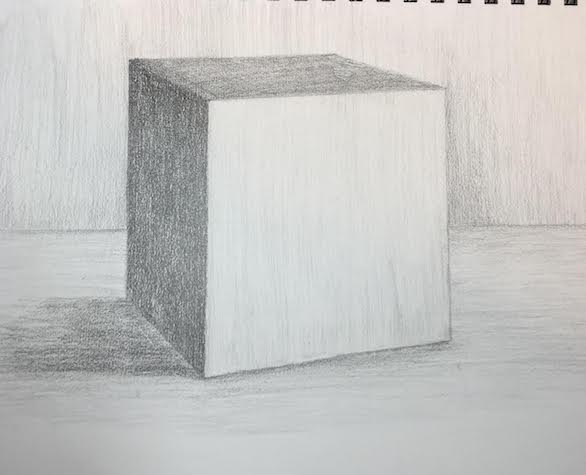
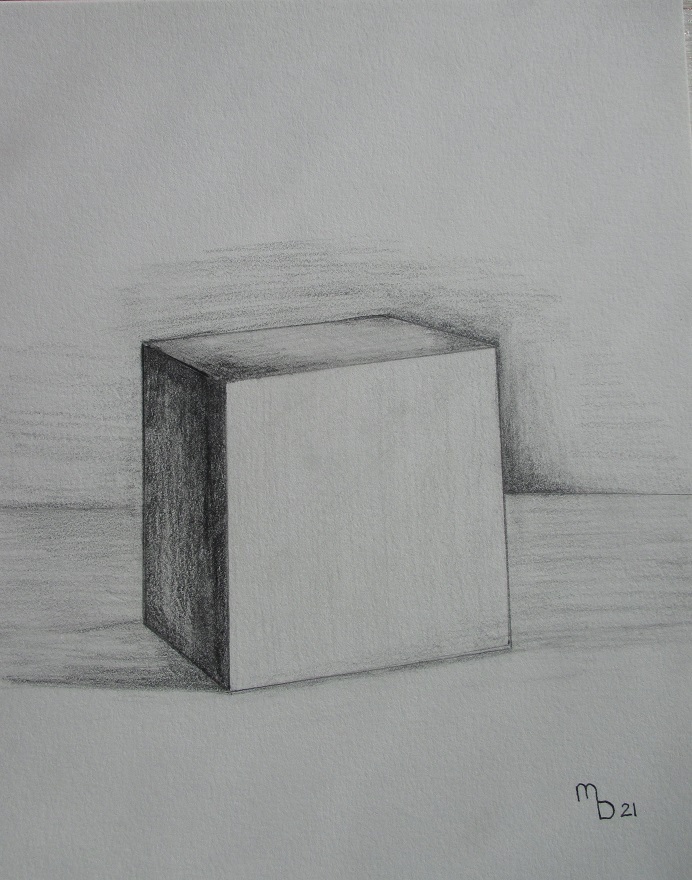
Exercise 2: Cube Tonal Practice
Apply tonal perspective to depict the full volume of a cube. You’ll study how light defines form, focusing on cast shadows, reflected light, and smooth transitions across the cube’s planes. Through tonal gradation, you’ll express volume, depth, and atmosphere.
Part 2. Gift Boxes.
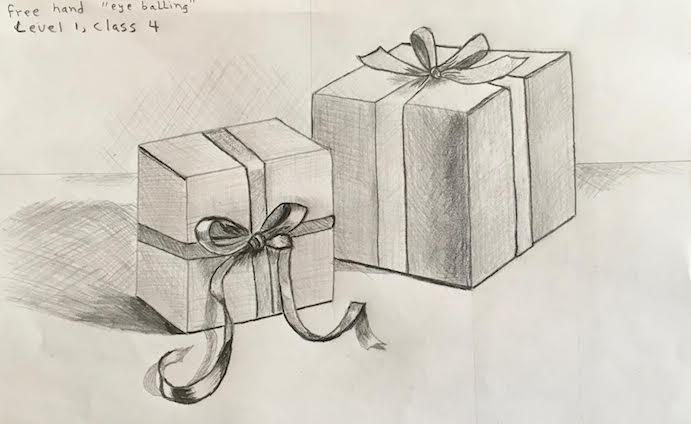
Exercise 3: Intuitive Method
Use your eye and intuition to place and proportion your subject on the paper. This exercise develops visual judgment and confidence in freehand drawing without strict measurement.
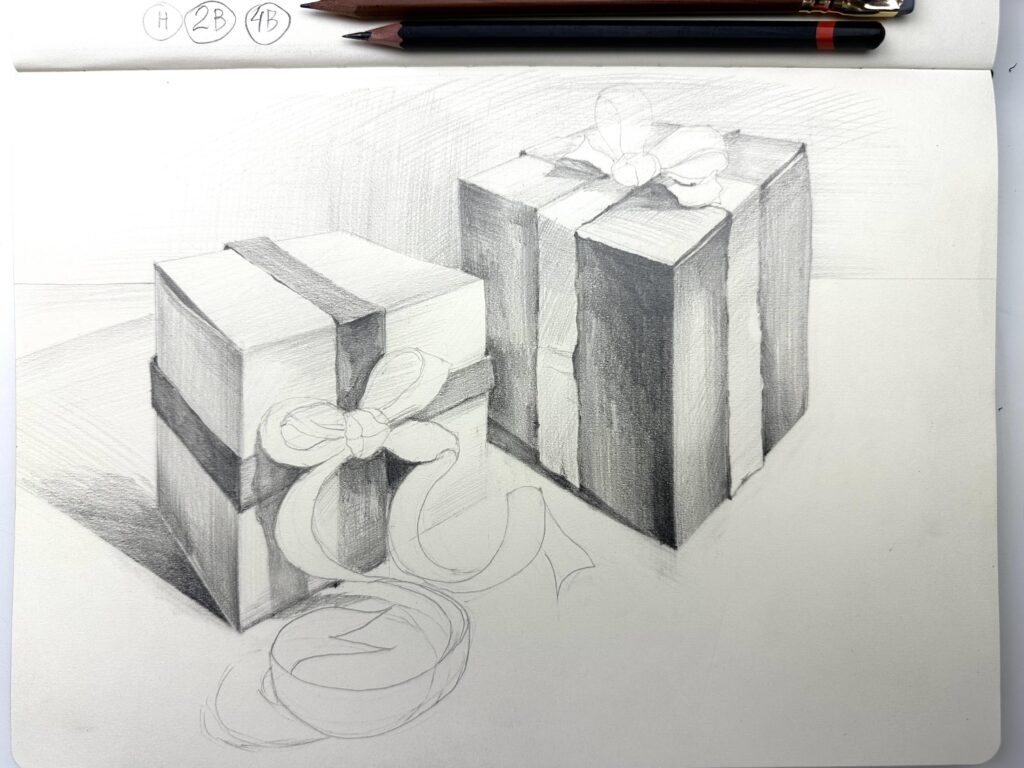
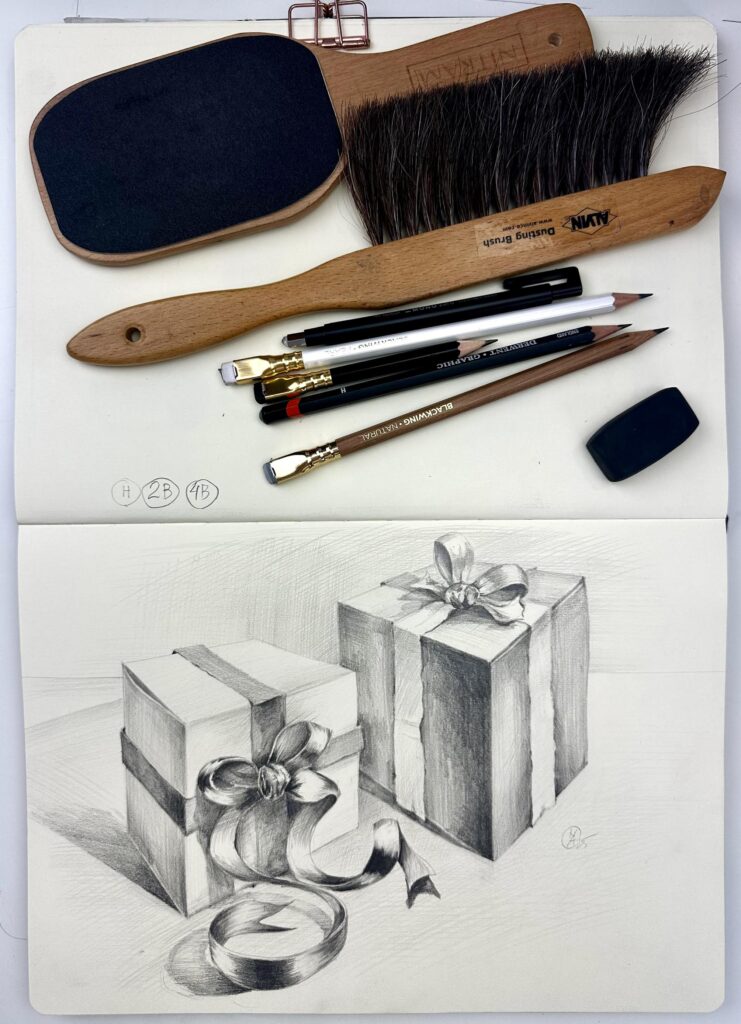
Exercise 4: Gift Boxes — Tonal Study
Practice recognizing and rendering value transitions across the sides of boxes. By applying tonal gradation, you’ll create the illusion of structure, depth, and realistic form within your still life composition.
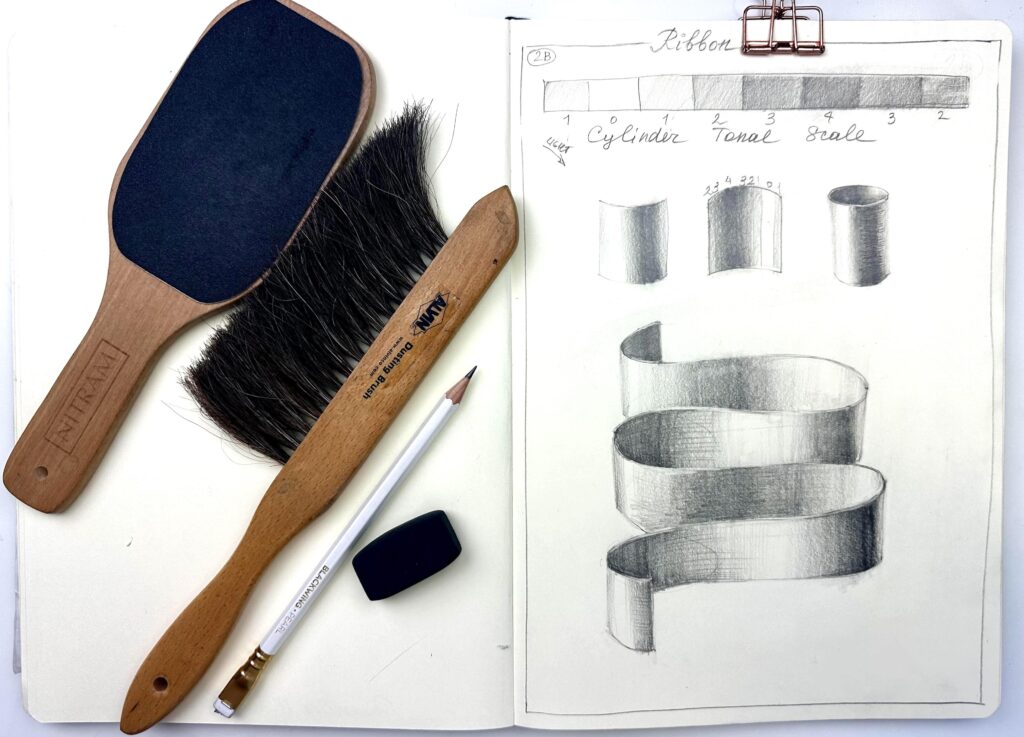
Exercise 5: Ribbon Practice
Create the realistic illusion of a flowing ribbon by applying the tonal logic of the cylinder form. You’ll explore how light and shadow interact along curved surfaces to convey rhythm and movement.
Exercise 6: Gift Boxes — Bows
Render realistic bows using layered pencil tones. You’ll practice gradual shifts from light to shadow to achieve a convincing sense of roundness, texture, and volume.
By the end of this lesson, you will gain a deeper understanding of tonal logic and the relationship between geometric form, light, and shadow – foundational skills that form the backbone of analytical drawing.
Proportional Method Cube Tonal Intuitive Method Gift Boxes Tonal Ribbon Gift Boxes Bows
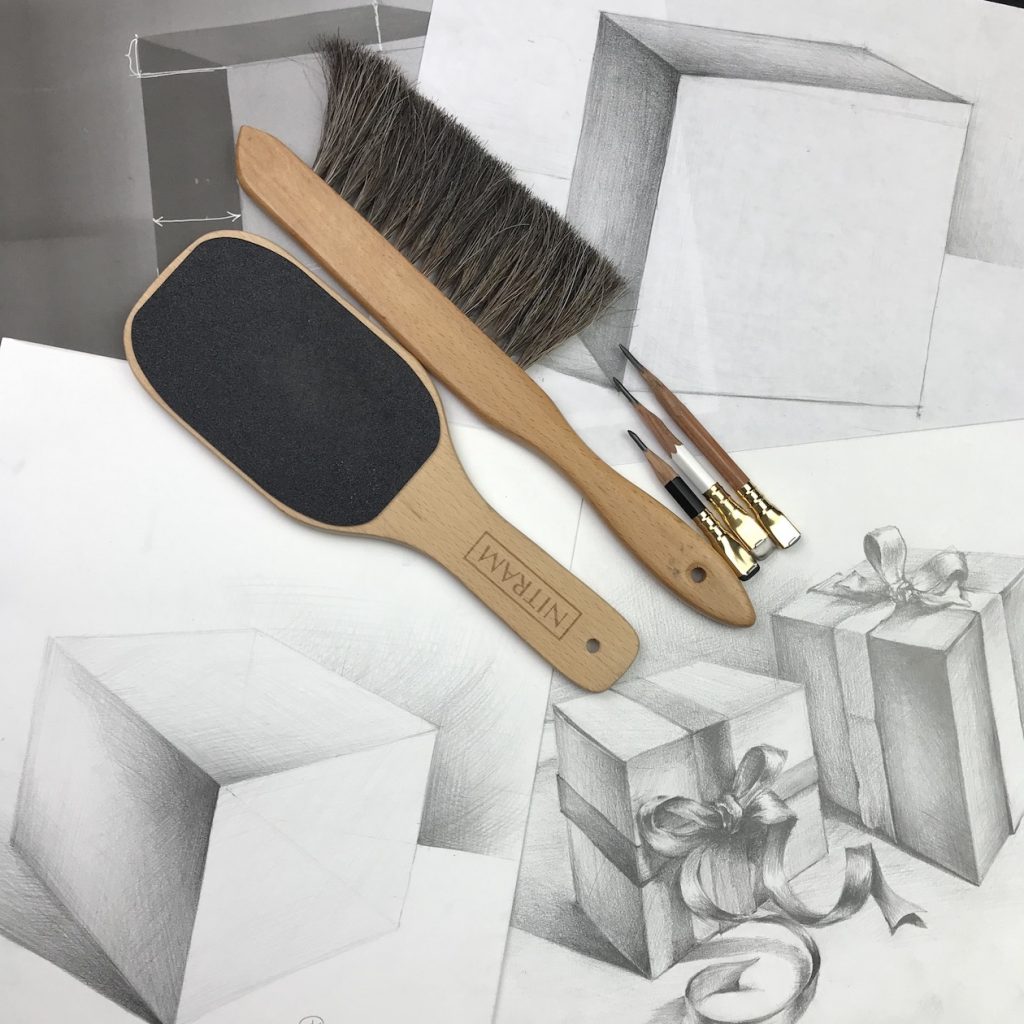
Materials you need for practical exercises:
- Any type of drawing paper (even printer paper will work just fine)
- Any brand of pencils 2H, H, 2B and 4B
- eraser (black, kneaded, detailed (TOMBOW MONO)
- pencil sharpener
- dust brush
- even more time and patience


Materials used for the video demonstrations:
- Sketchbook TALENS Art Creation, 8.3 x 11.6 inches (21 x 29.7 cm)
- Pencils BLACKWING, extra-firm (H to 2H), balanced (2B), soft (4B)
- Pencil DERWENT, 2H
- eraser FACTIS Black 16
- kneaded eraser FABER-CASTELL
- eraser TOMBOW Mono, rectangular and round shape
- Sharpening block NITRAM
- dust brush
- parchment paper
- paper clips
To print:

OVAS APD L3 Cube Template 
OVAS APD L3 Cube reference 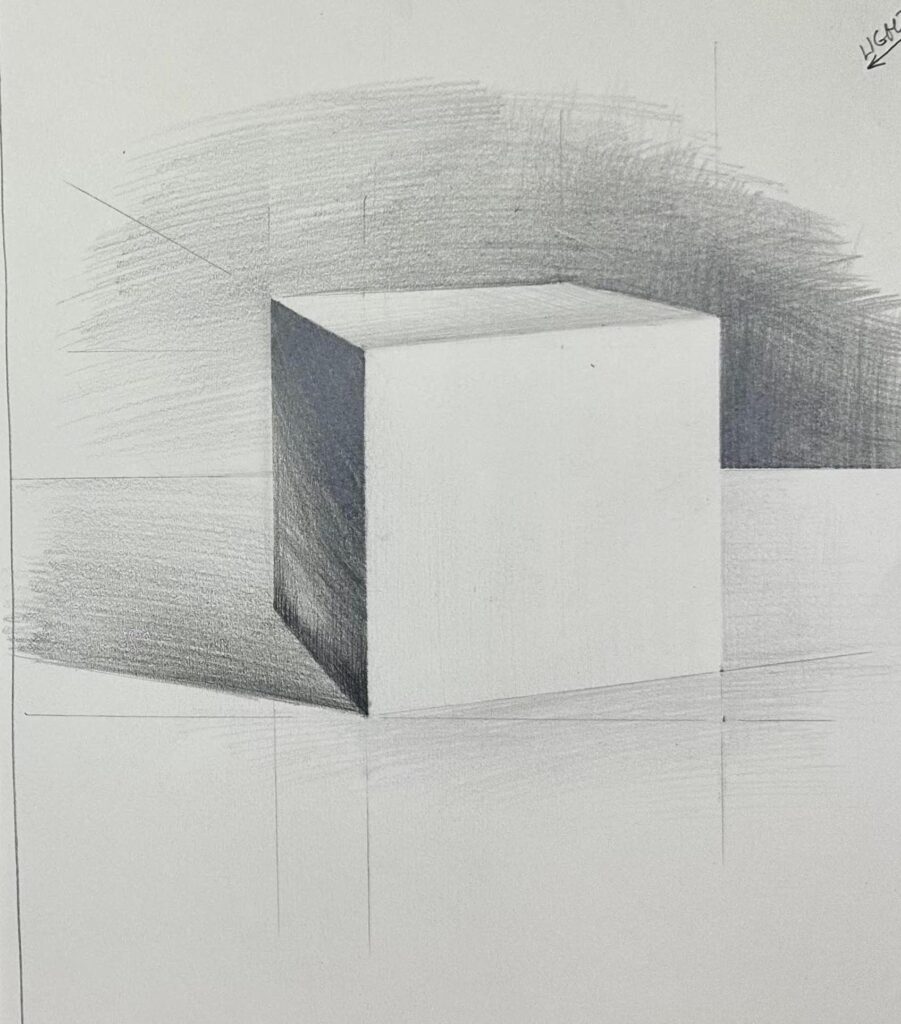
OVAS APD L3 Cube Pencil 
OVAS APD L3 Gift Boxes Reference 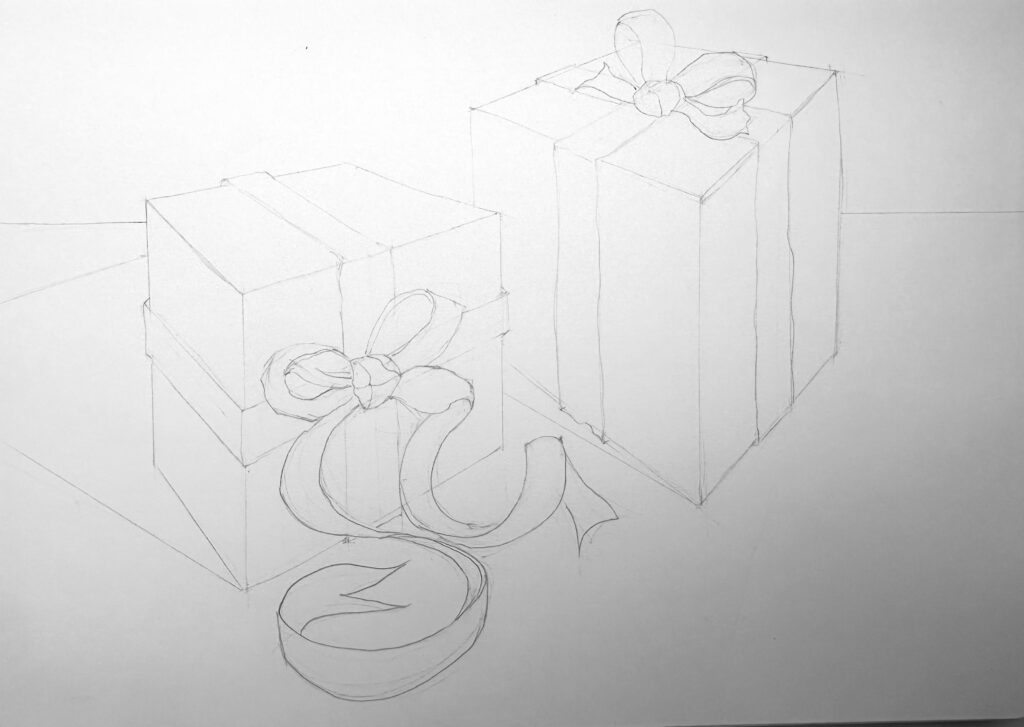
OVAS APD L3 Gift Boxes Template 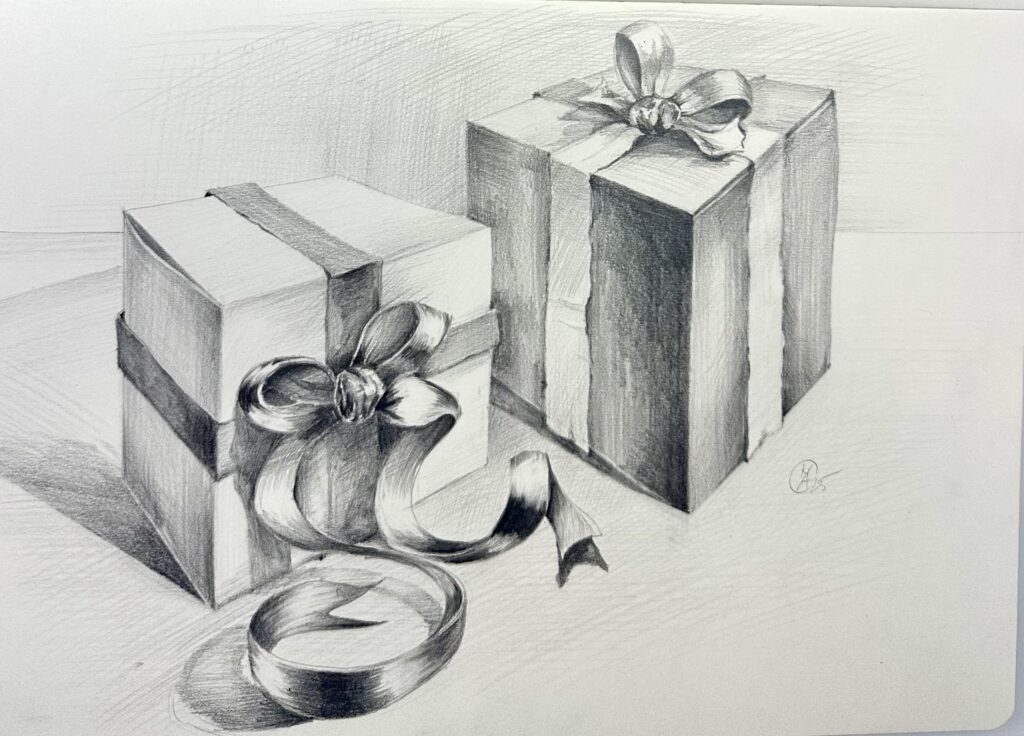
OVAS APD L3 Gift Boxes Pencil
This PDF file was created when I first began offering this course online via ZOOM, before I developed the Art Studio website. You can download these earlier versions of Lesson 3 and keep it for your personal practice.
Exercise 1. Cube. Proportional Method of Constructing on paper
Estimated time to complete the exercise(s): about 30-40 minutes
To print for homework references:

OVAS APD L3 Cube Homework Reference 1 
OVAS APD L3 Cube Homework Reference 2 
OVAS APD L3 Cube Homework Reference 3 
OVAS APD L3 Cube Homework Reference 4
Use these buttons to navigate the lesson content
Student’s work


Use these buttons to navigate the lesson content
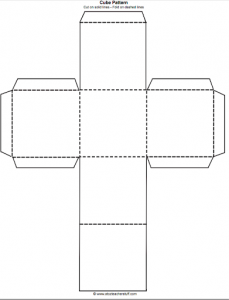
Additionally for this class you will need (optional):
- Cube model. Any cube shape box. Or make it using the pattern (file attached). Print the pattern, cut it and glue it together. (optional)
- Table lamp.