Materials
To learn about what you need for this course, please refer to the chapter INTRODUCTION TO THE COURSE. REFERENCES and MATERIALS
Lesson Structure
Each lesson contains a few exercise blocks with indicators about how much time you need to accomplish the exercises and a list of materials.
You can scroll from block to block using the navigation buttons: where the BLUE buttons navigate the theory chapter, and ORANGE buttons navigate the practical exercises.
How to Use the Video tutorials
Start with the description – Read the lesson description carefully to understand the focus of the project.
Prepare your references – Print the provided reference image and template (if available).
Watch first, pracice later – Watch the entire video tutorial once without drawing. This will give you the full picture of the process before you begin.
Get ready to draw – Gather all your materials
Learn step by step – Watch the video a second time, but in short sections. After each segment, pause the video and repeat the instructions on your own paper. You can stop, rewind, and rewatch as many times as you need.
Share your work – Once you’ve finished your drawing, take a clear photo of your work and upload it using the submission window at the bottom of the lesson page.
Please remember, real progress in drawing comes through steady practice. Each exercise may need to be repeated several times, sometimes dozens, even hundreds of times, before you see progress. Pencil drawing is a time-intensive medium, so don’t expect immediate results. Instead, give yourself time and enjoy the process.
Train your eyes to observe the subject from different angles, distances, and lighting. Notice how shadows appear and shift. Keep small, inexpensive sketchbooks and pencils in different spots around your home; on the kitchen table, near the sofa, or beside your favourite chair. Use them to practice hatching, shading, and gradation strokes whenever you have a few free minutes.
Even short, casual practice sessions add up. This kind of mindful repetition trains your hand and eye, and gently builds skill, even after a long workday.
With time, you’ll find that quantity transforms into quality, and before long you’ll be able to create beautiful pencil drawings with ease and confidence.
Lesson 1
Use these buttons to navigate the lesson content
Please use this navigation button to jump directly to the homework upload section at the bottom of the lesson page
THEORY AND VISUAL EXERCISES
The Path to Space – Understanding the Horizon Line
In this theory section, you’ll explore one of the most essential foundations of drawing: the line of horizon. Using these simple but powerful diagrams you’ll discover how the horizon line guides the entire structure of your drawing.
You’ll learn:
- How to find the horizon line in both your reference and your own sketch
- How to determine perspective by visualizing the frontal plane in space
- Why the horizon line matters most — it is the anchor that organizes all objects, showing how they sit, rise, or recede in your composition
By practicing with glass of water, observing the ellipses and cubes, you’ll begin to see that the horizon line is not just a line, it’s the path to space, creating depth, balance, and clarity in every drawing you make.
To print:
Please print these images (Image 1; Images 2); or you could draw a small simplified copy of them in your notebook.
These images are only for the theory part. You might want to take some notes during the theory part of the class.

OVAS APD L1 Image 1 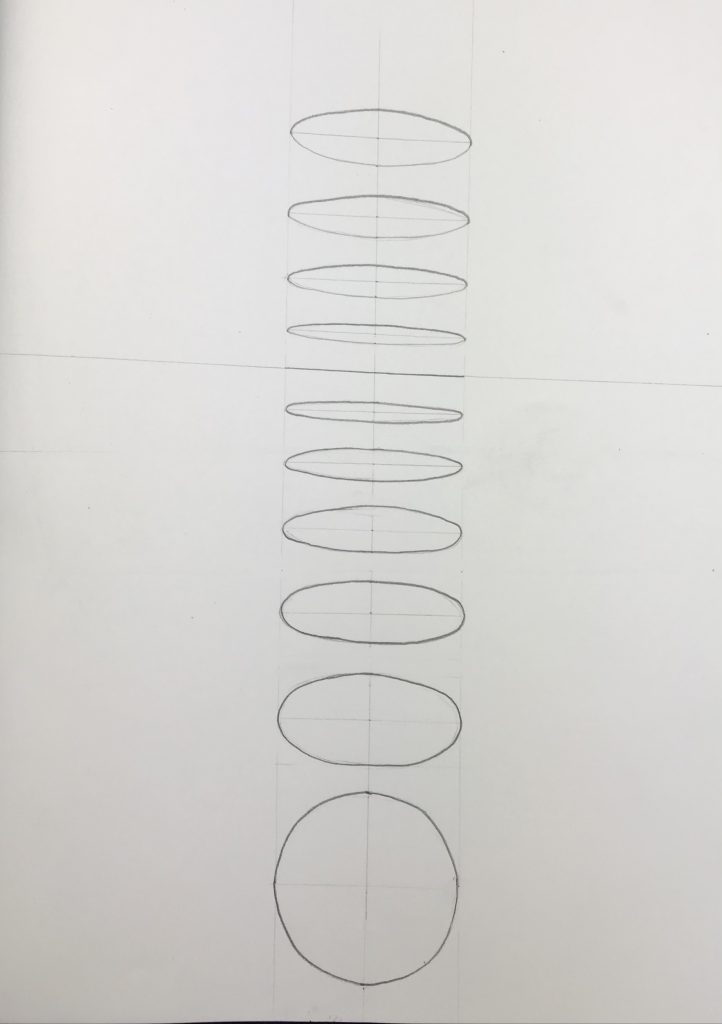
OVAS APD L1 Image 2
Where is the Line of Horizon?
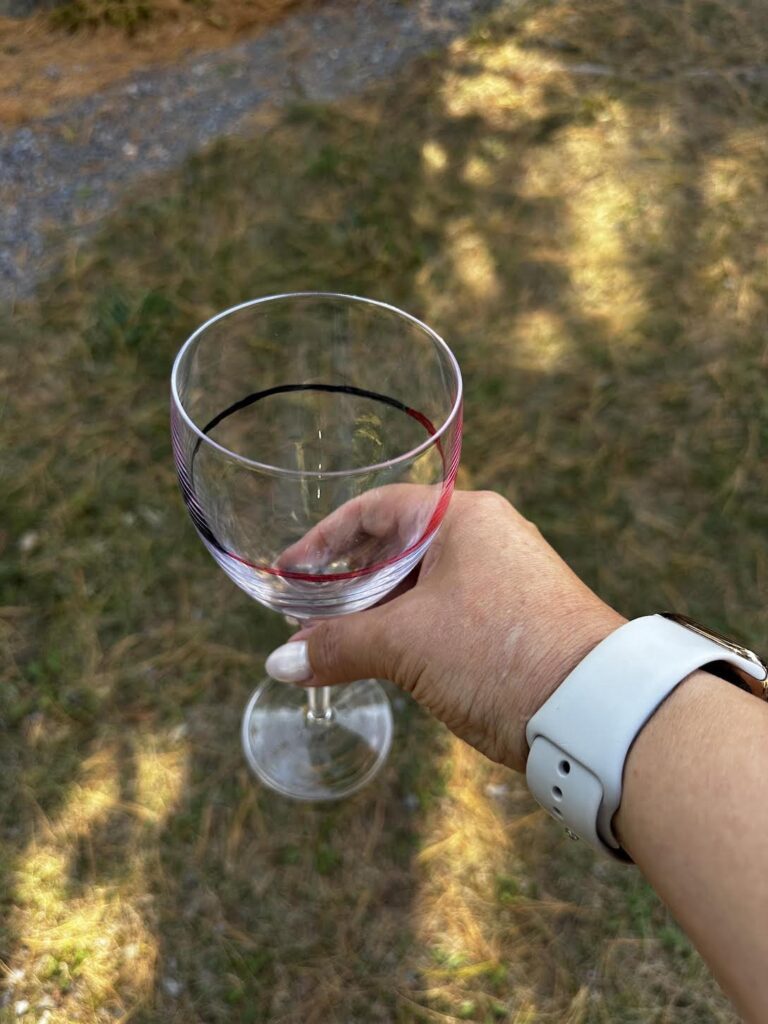
For this first visual exercise, you’ll need a glass or bottle filled with water.
To demonstrate, I filled a glass and marked the water line on the inside using two markers (red and black) so it’s easier to see.
Let’s begin.
Stand up, hold your glass, and lower your hand. Look carefully at the “water ellipse” that has formed, the shape of the water’s surface inside the glass. From this angle, it appears almost round or like a very open ellipse.
Now, slowly lift the glass higher and observe how the ellipse changes shape, it becomes narrower, more “closed.”
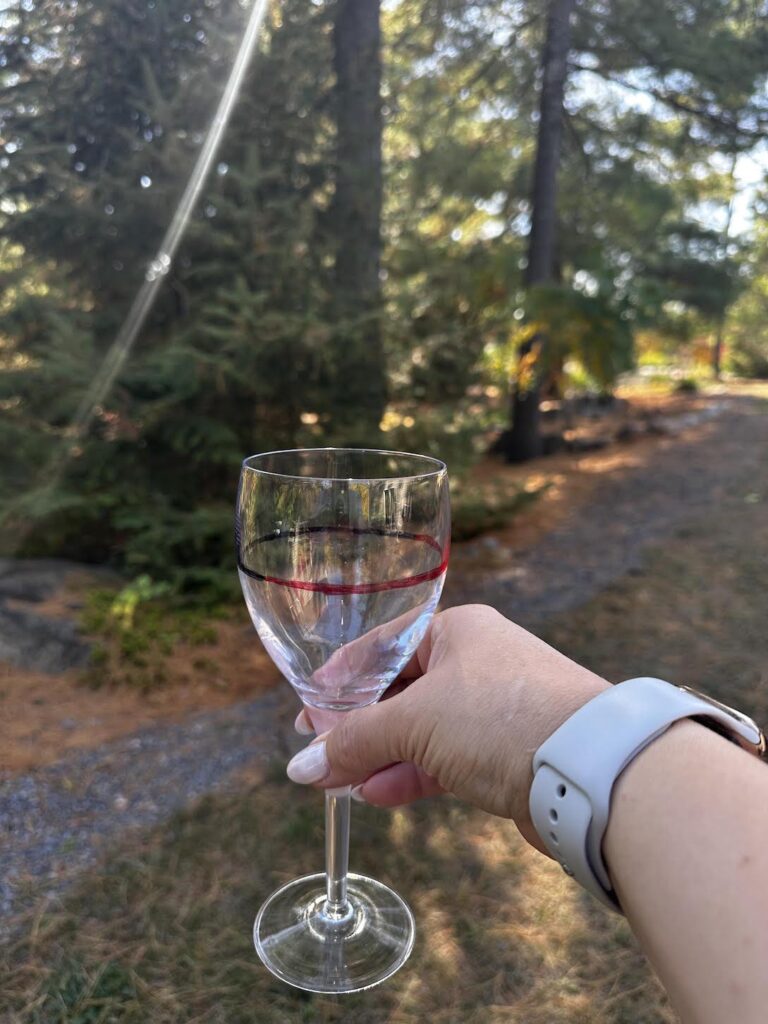
Next, raise or lower the glass until the front and back edges of the water line align into a straight line. That is your line of horizon.
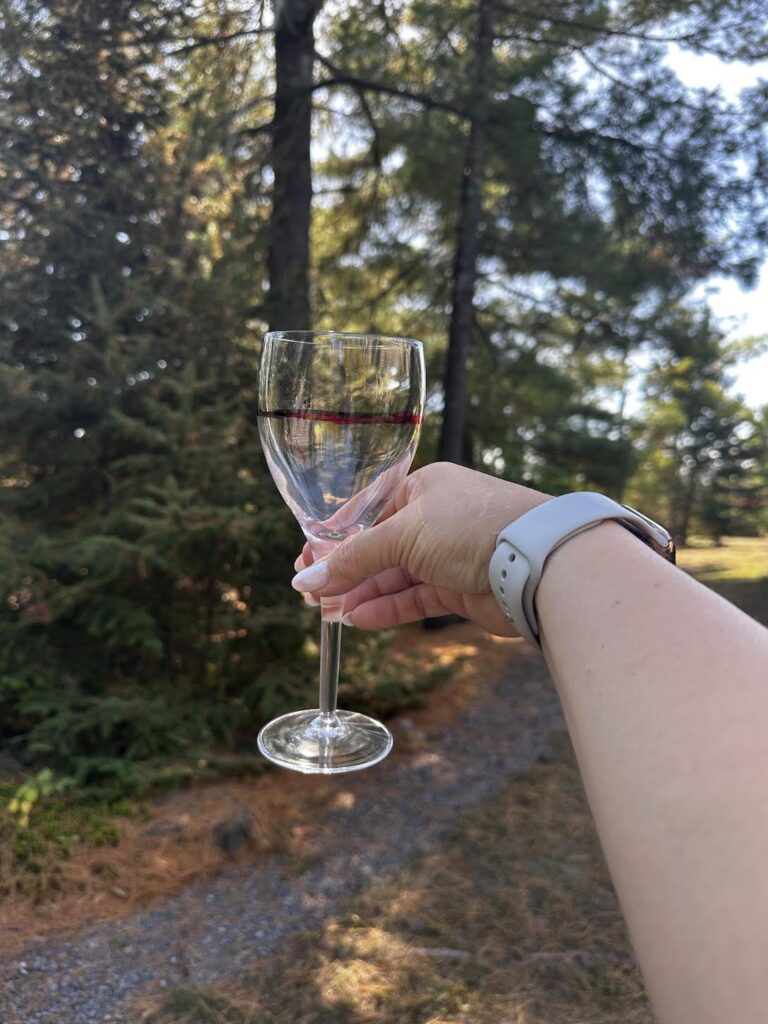
The line of horizon isn’t something that exists physically in nature, you can’t touch it. It’s a visual line that always sits at the level of your eyes.
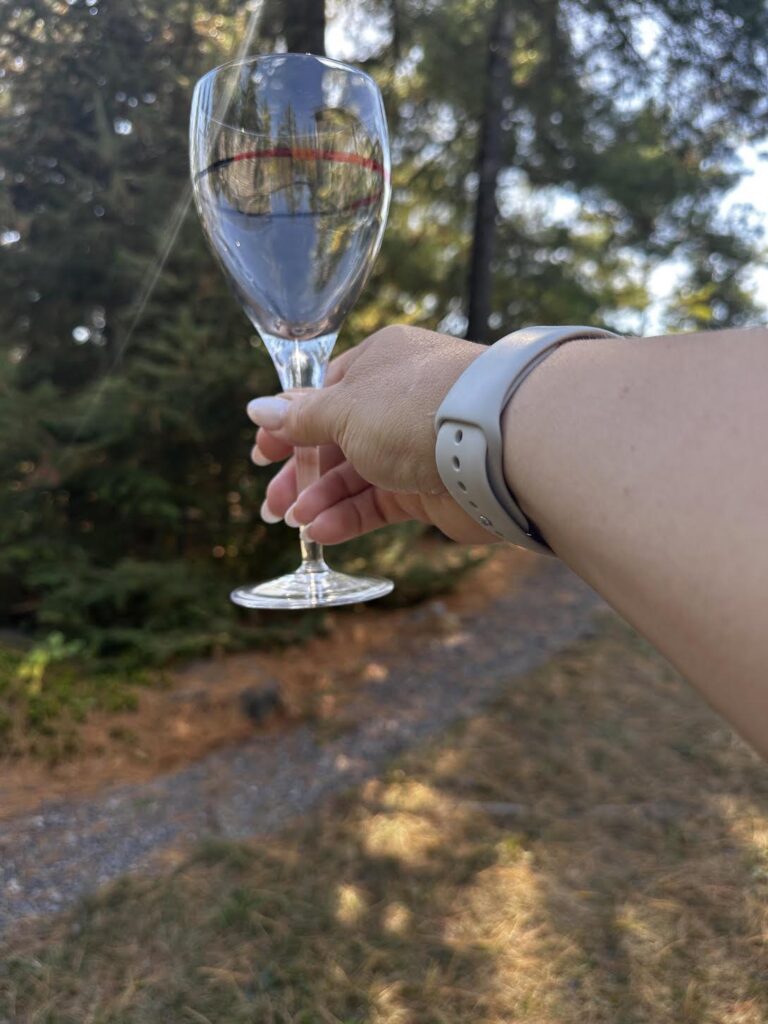
To understand this better, return to the position where your glass is aligned (the water line looks straight). Now bend your knees slightly, keeping your hand at the same level. Notice how the ellipse of the water becomes more open? That means your eye level—and therefore your horizon line—has changed.
The key takeaway from this exercise is simple but fundamental:
➡️ Every person has their own line of horizon, and it always matches their eye level.
For example, if one person is standing and another is sitting in the same room, they will each have a different horizon line—and they’ll see the same objects from different angles.
Now, take a look at Image 2, the diagram with multiple ellipses.
The line in the middle of the page represents the horizon line.
This diagram shows how the “water ellipse” of a glass will appear depending on its position relative to that line:
- When the glass is below the horizon line, you see the ellipse open toward you (the red line appears below the black line).
- When the glass is at the horizon line, the ellipse looks like a flat line on paper.
- When the glass is above the horizon line, the ellipse opens away from you (black line below, red above).

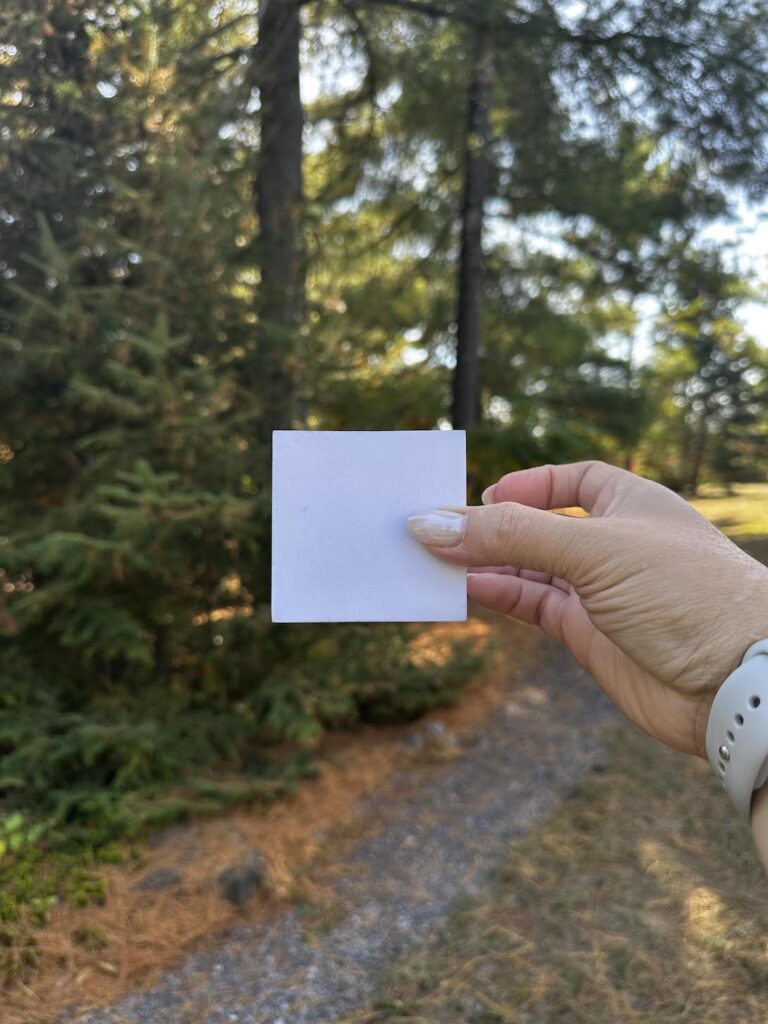
For the next visual exercise, you’ll need a square box, I’m using a simple cube from a geometry learning set.
In the photo, you can see that only one side of the cube is visible.
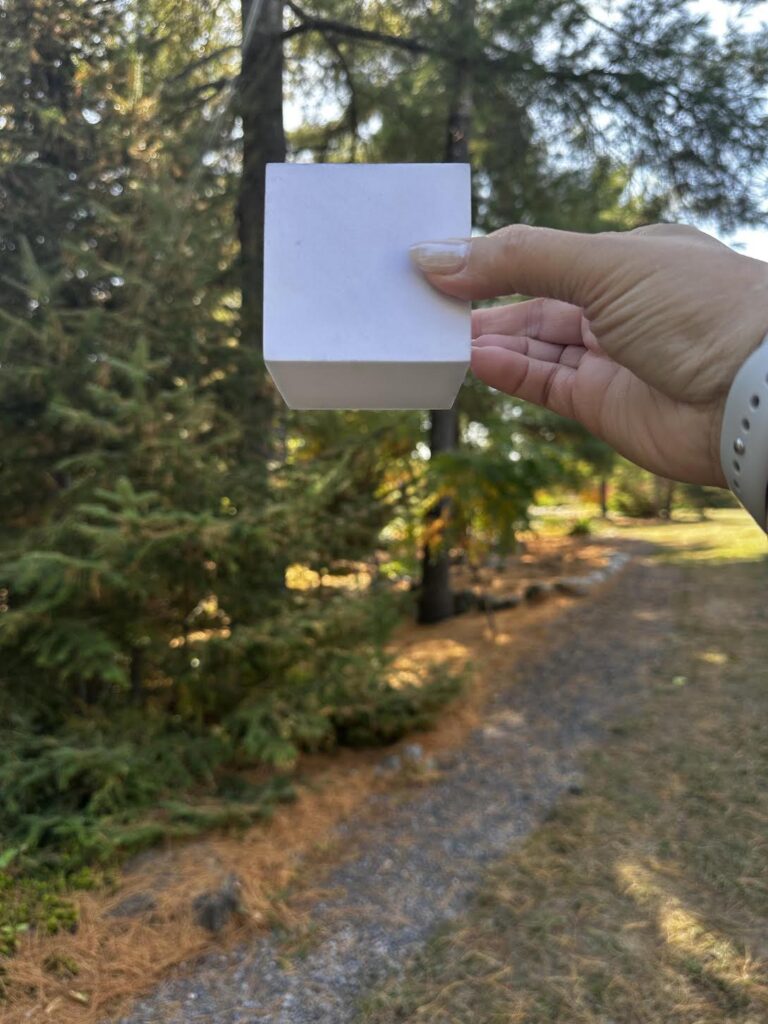
Now, move the cube upward – the bottom becomes visible. That means the cube is above the horizon line.
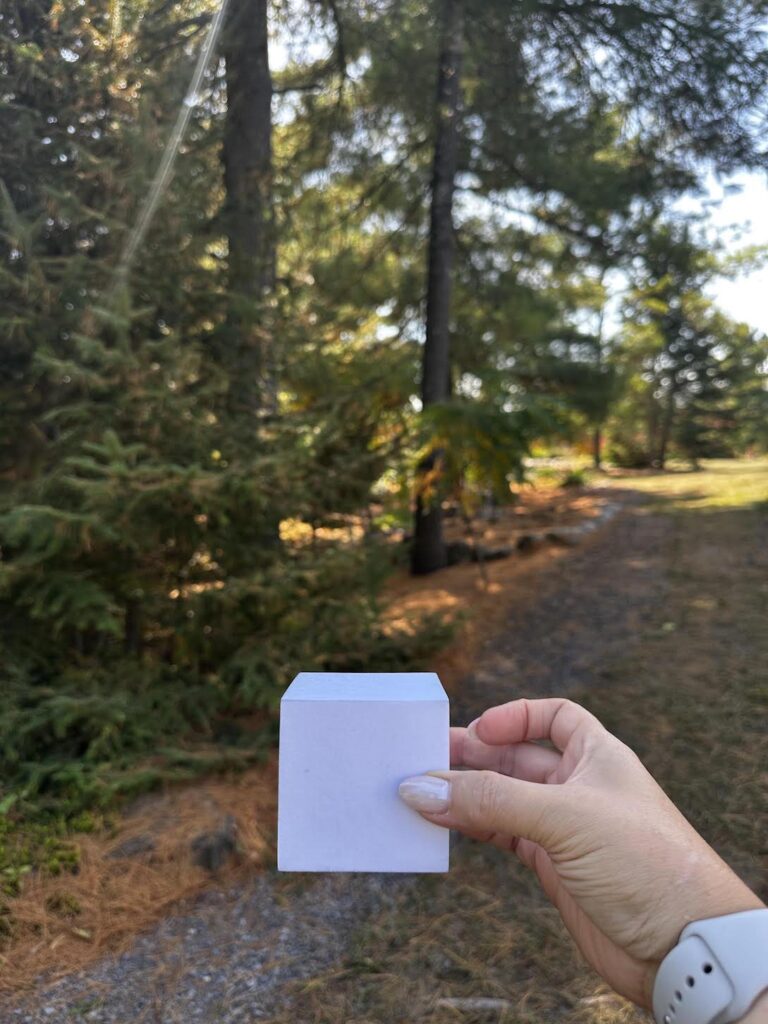
Move it downward, and you’ll see the top – which means the horizon line is now above the cube.
On Image 1, you can see that the horizon line runs right through the middle of the cube.

By the way, when you see only the front side of any object (without seeing the top, bottom, or sides), that is called frontal perspective.
And please, don’t panic when you hear the word perspective!
To make it easier, we’ll use the word illusion instead, because perspective isn’t a physical object; it’s a visual illusion that helps your brain understand and represent space on paper.
There are many types of perspective, around fifteen ways to show space visually, but for now, let’s focus on understanding the most important one: the line of horizon.
Remember:
➡️ There is only one horizon line in any photo, painting, or drawing.
If you are using a photo as your reference, the line of horizon is already determined, it’s at the eye level of the person who took that photo. We’ll explore how to find it in your references and drawings through several practical exercises later in the course.
For now, let’s move on and start practicing your pencil strokes!
PRACTICAL EXERCISES
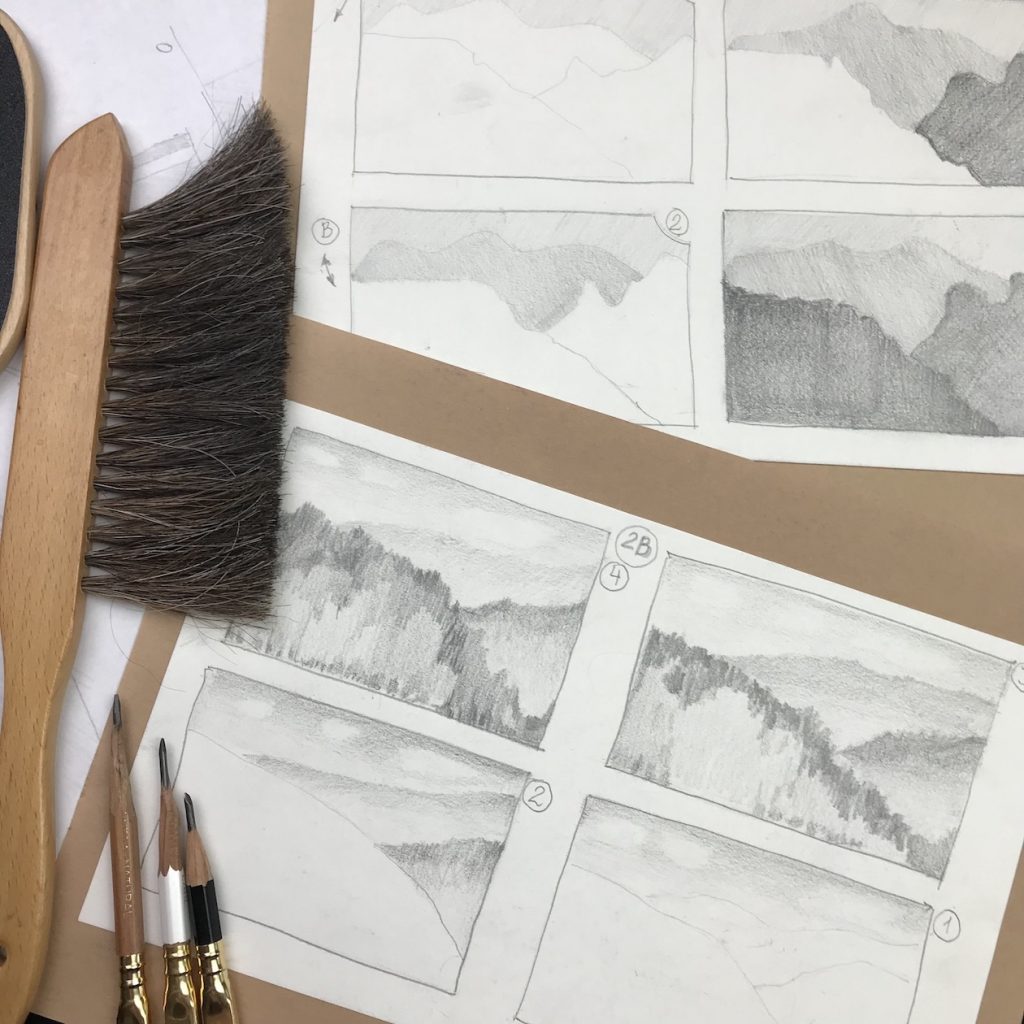
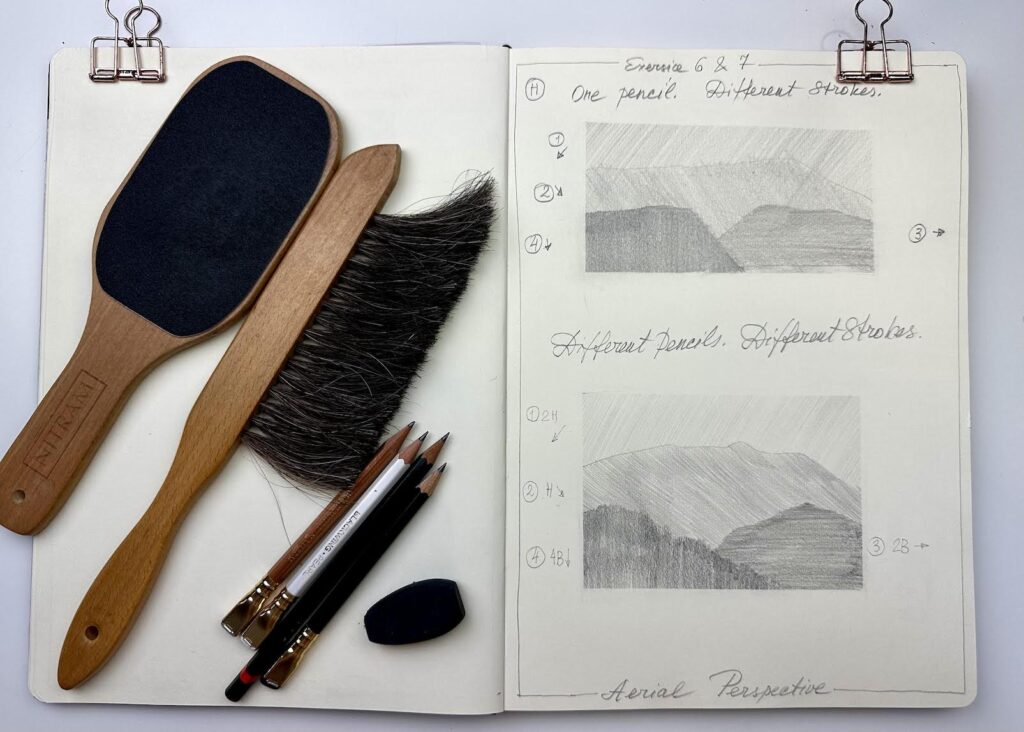
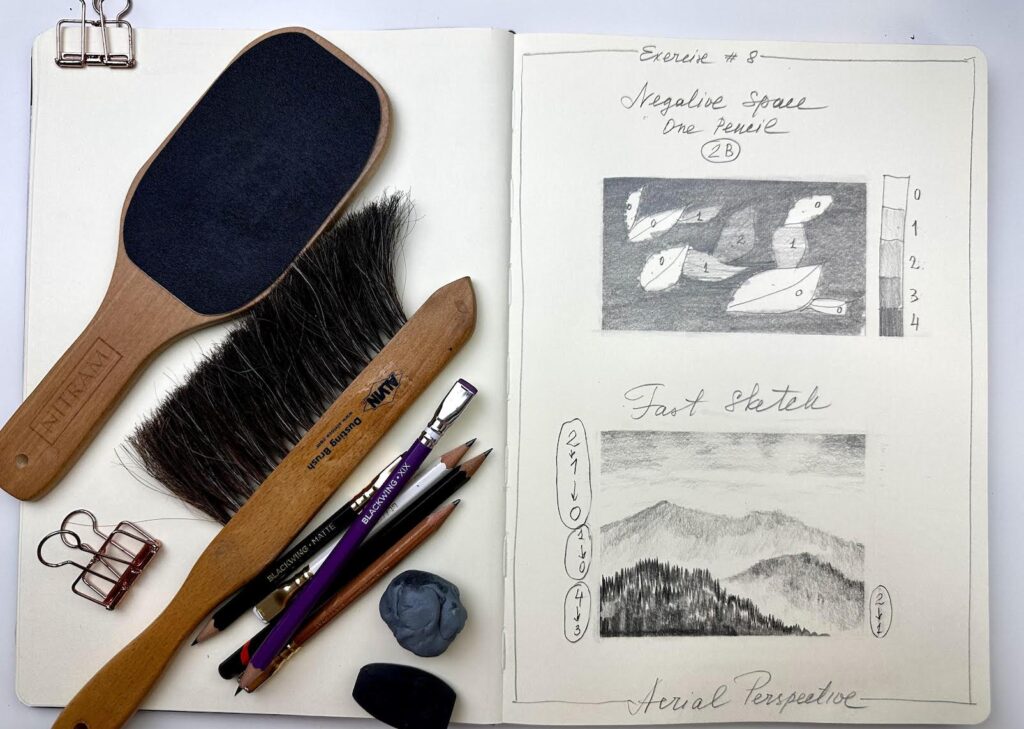
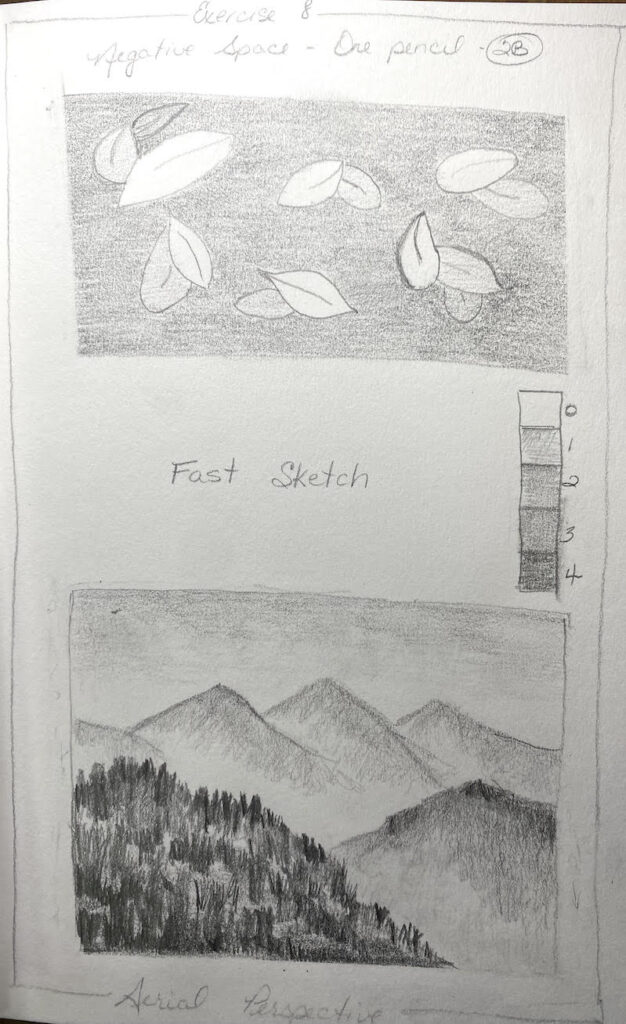
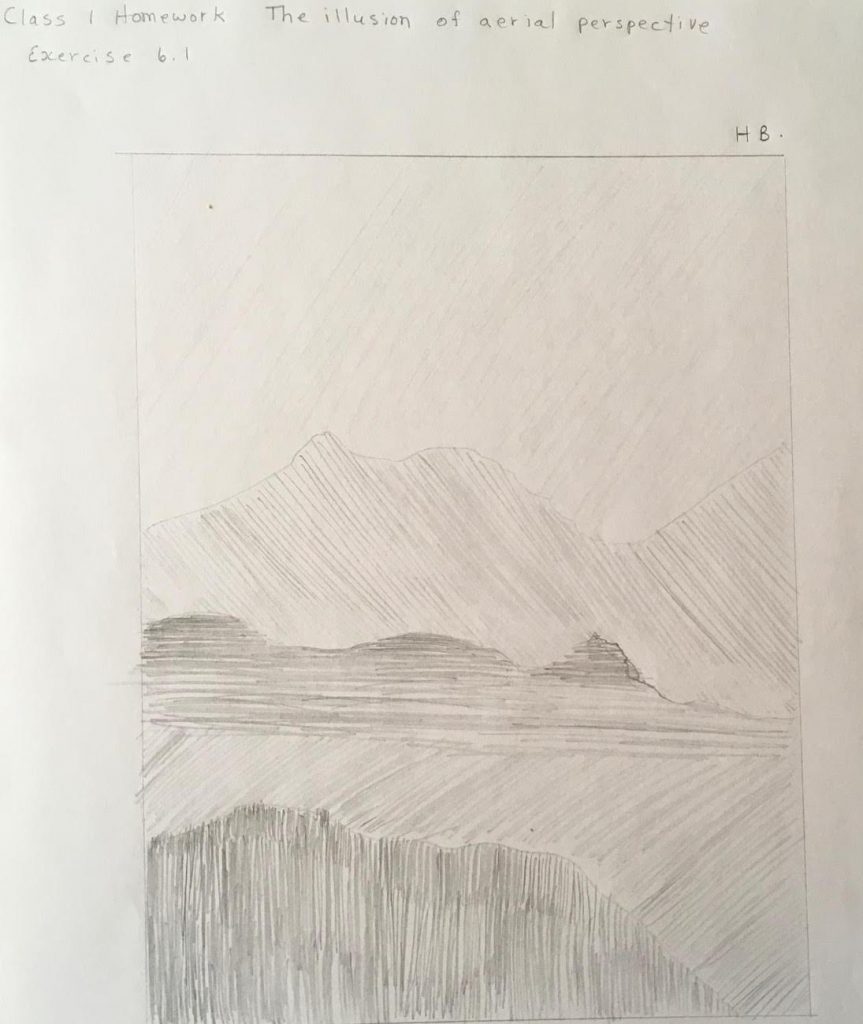
Learn how to build space and atmosphere in your drawing from the very first line. You’ll practice simple landscapes using aerial perspective, and understand how tone brings depth to space.

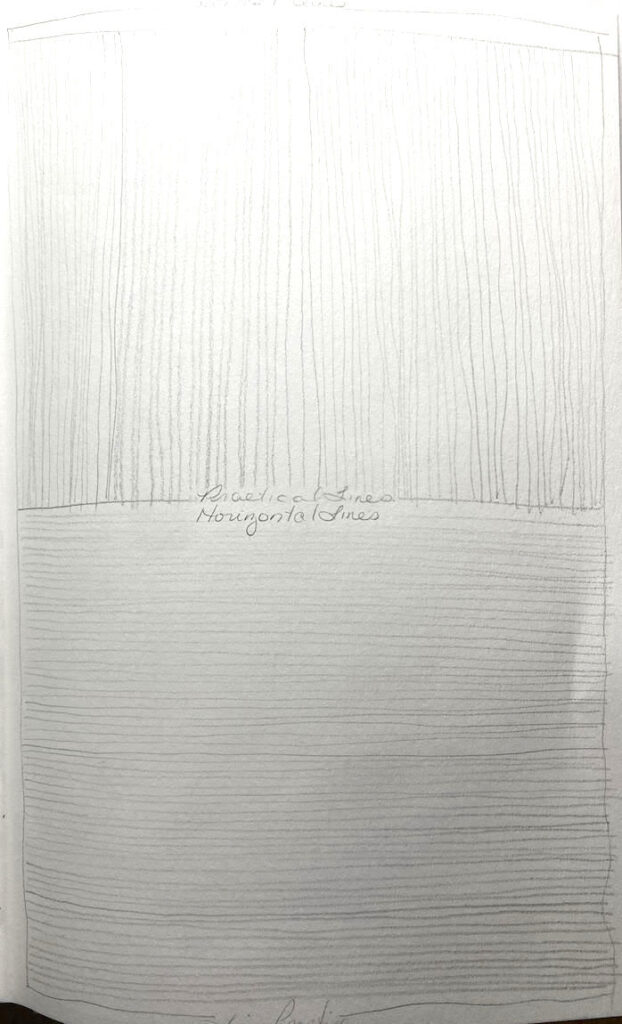
Exercise 1 & 2 Lines 
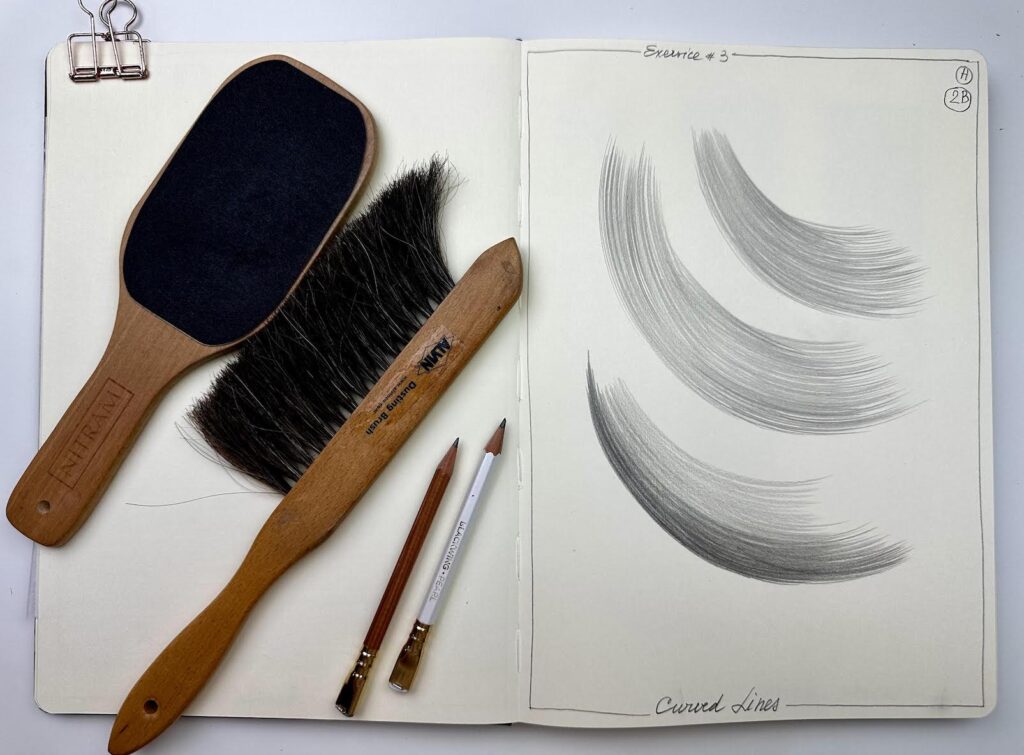
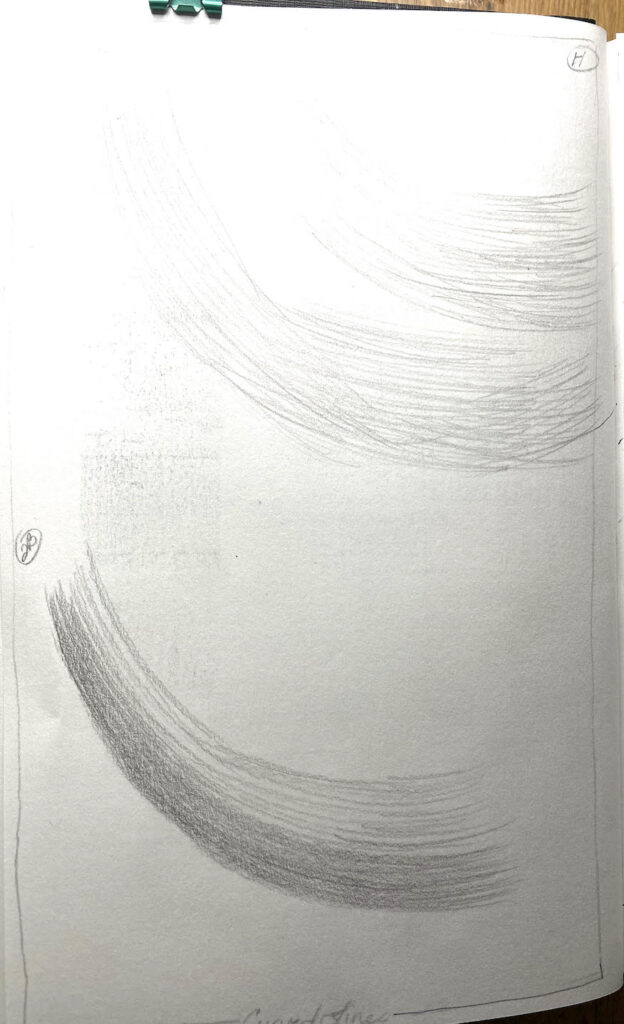
Exercise 3 Curved Lines 
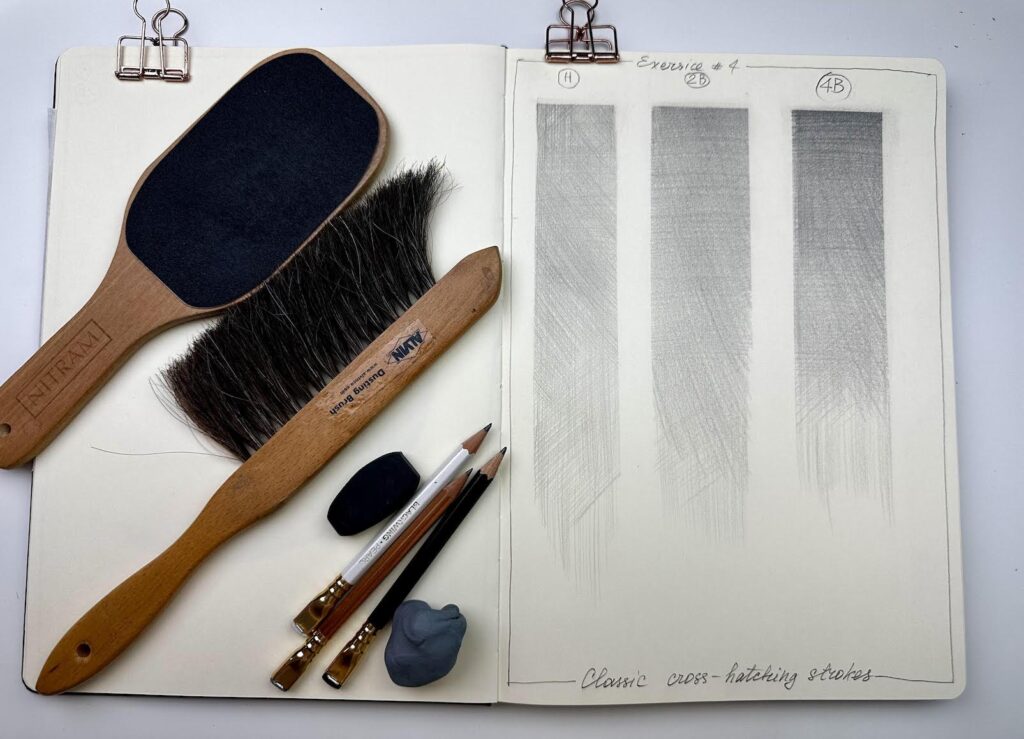
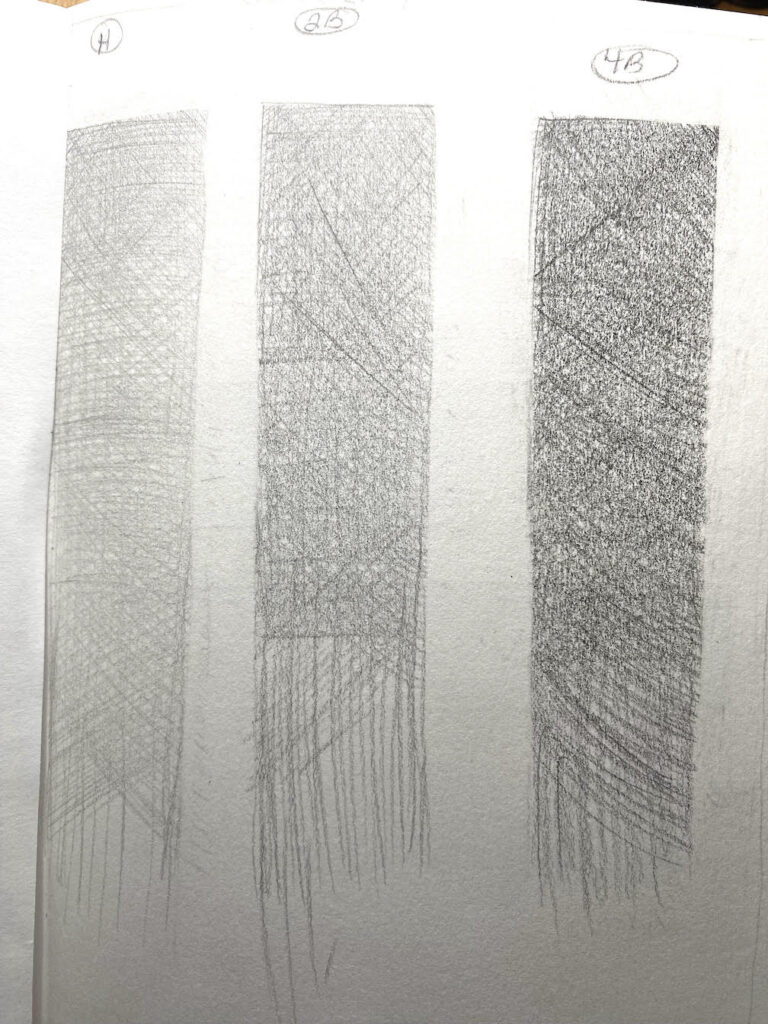
Exercise 4 Cross-Hatching 
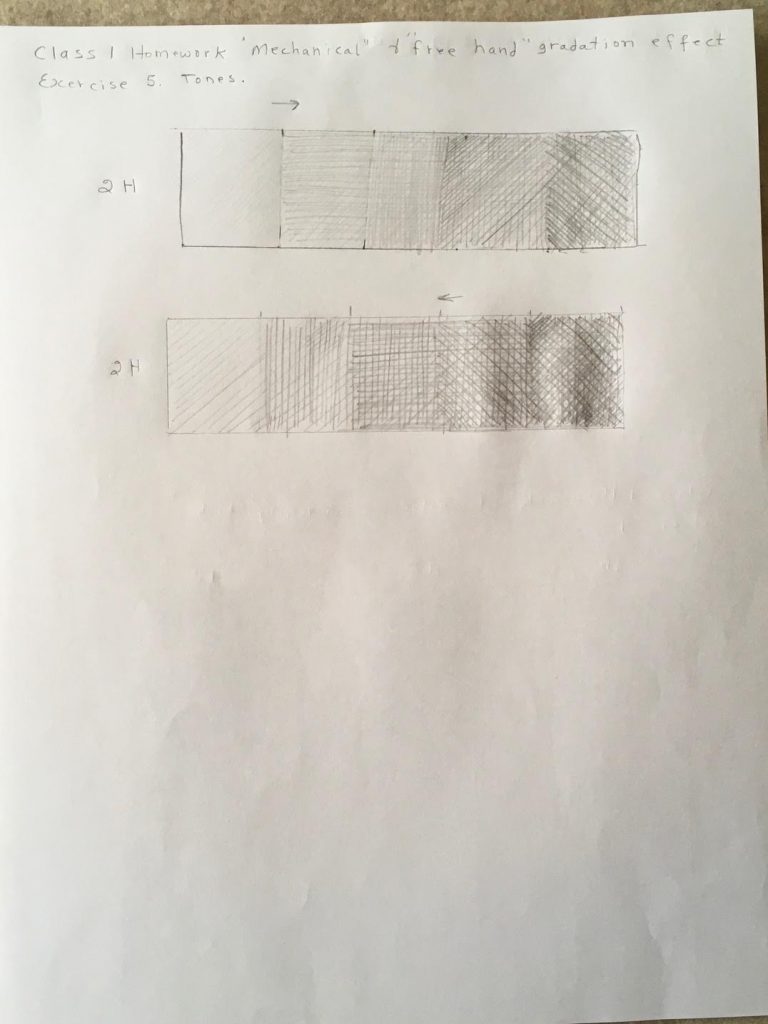
Exercise 5 Tonal Scale 
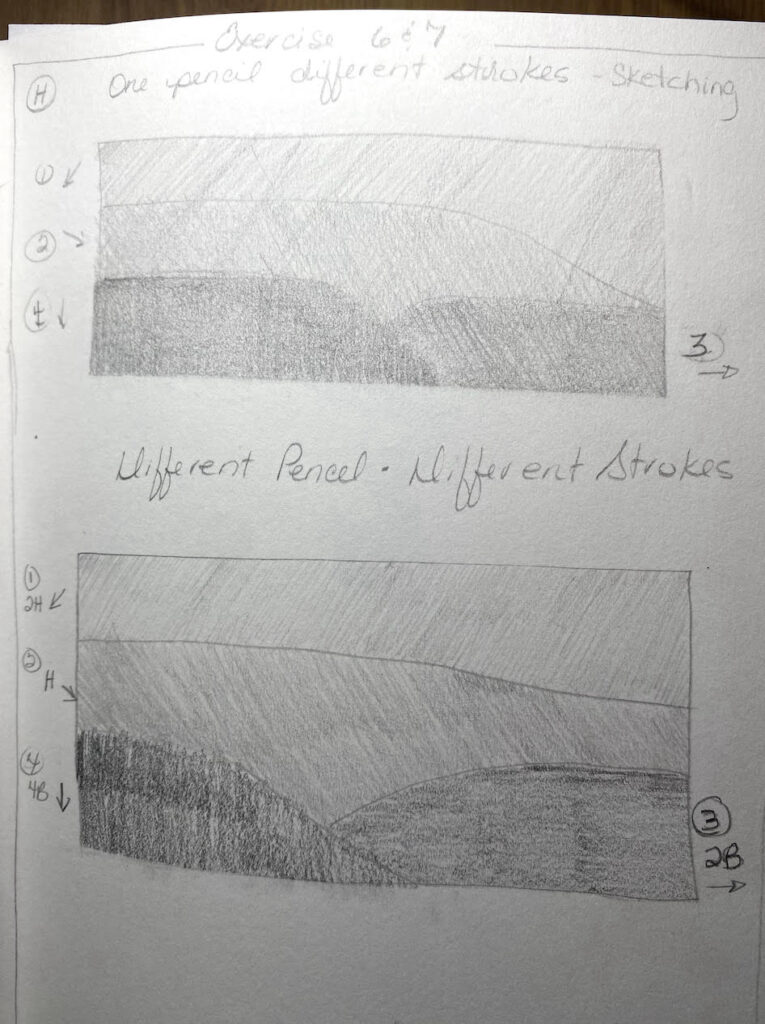
Exercise 6 & 7 Aerial Perspective 
Exercise 8 & 9 Negative & Sketch
Materials you need for practical exercises:
- Any type of drawing paper (even printer paper will work just fine)
- Any brand of pencils 2H, H, 2B and 4B
- eraser (black and kneaded)
- pencil sharpener
- dust brush
Materials used for the video demonstrations:
- Sketchbook TALENS Art Creation, 8.3 x 11.6 inches (21 x 29.7 cm)
- Pencils BLACKWING, extra-firm (H to 2H), balanced (2B), soft (4B)
- Pencil DERWENT, 2H
- eraser FACTIS Black 16 and kneaded eraser FABER-CASTELL
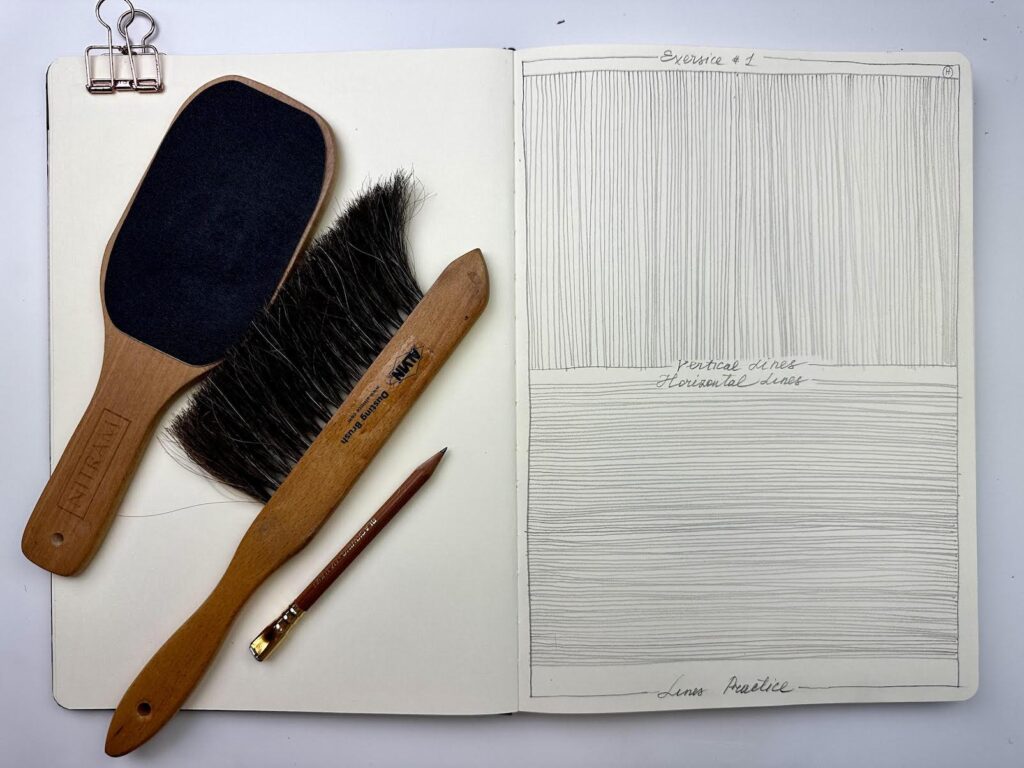
- Sharpening block NITRAM
- dust brush
- parchment paper
- paper clips
To print:
This PDF file was created when I first began offering this course in person, before I developed the Art Studio website. You can download this earlier version of Lesson 1 and keep it for your personal practice.
Exercise 1 & 2. Vertical and Horizontal Lines
Estimated time to complete the exercise(s): about 30-40 minutes

To print:

OVAS APD L1 Reference 1 
OVAS APD L1 Reference 2 
OVAS APD L1 Reference 3
Use these buttons to navigate the lesson content
Student’s work

Valorie 2020 


Tanya 2025 

Tanya 2025 


Tanya 2025 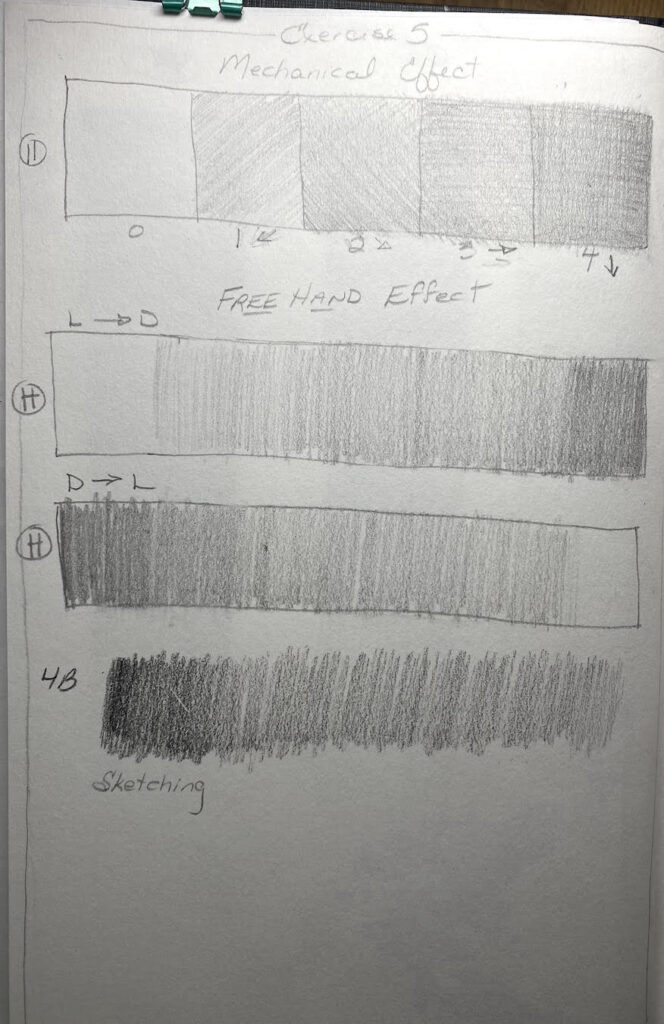
Tanya 2025-4 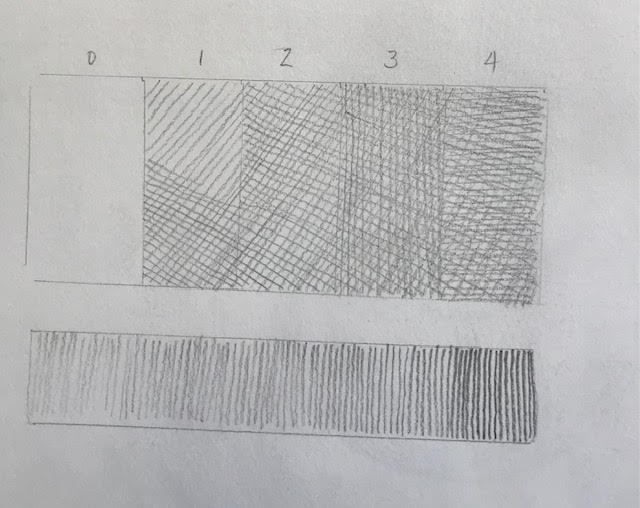


Tanya 2025 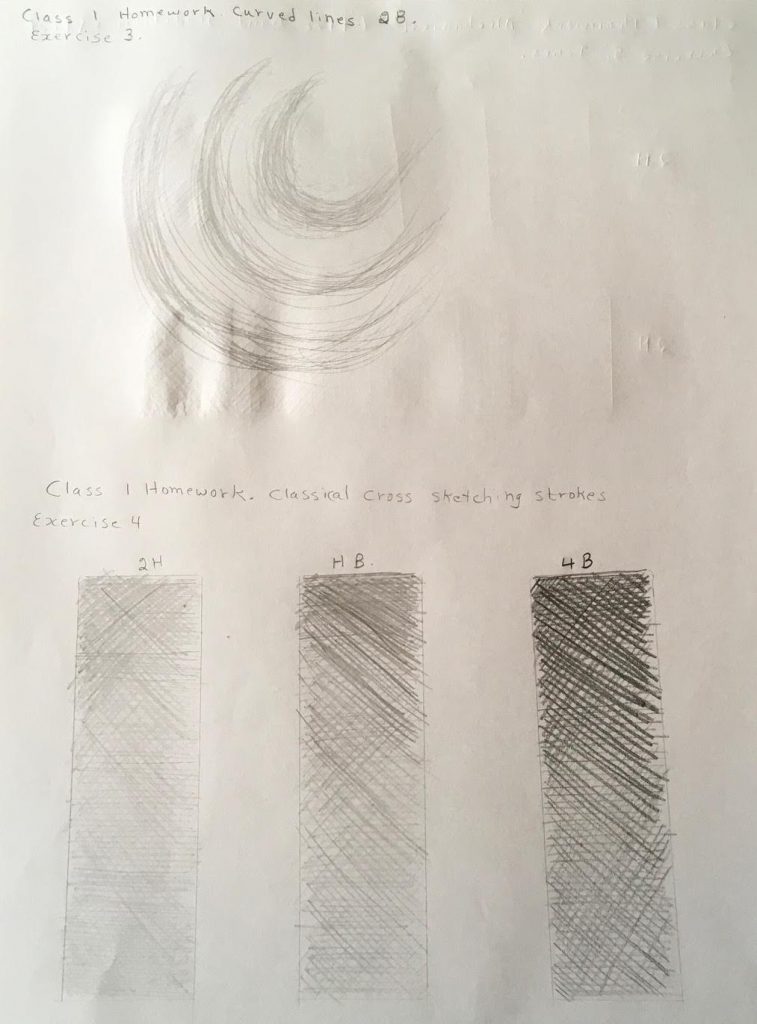
Tanya 2025
Use these buttons to navigate the lesson content
Additionally for the first class you will need (optional):
- A small box (light weight, preferable square);
- Transparent glass with water or some other liquid or/and small transparent plastic (glass) bottle with liquid;
- Marker.